
You can render images automatically using the buttons Auto
3D (Fast) and Auto
3D (Detailed) in the toolbar. ![]()
The second of the two buttons, Auto 3D (Detailed), provides better quality (for example, sharper contours and shadows). However, it requires more developing time. The difference in quality can be seen in these two images:
.png) |
.png) |
Auto3D (Fast) example image |
Auto3D (Detailed) example image |
When Configura runs in advanced graphics mode, the default setting for the Auto 3D buttons is to render images via a separate render server.
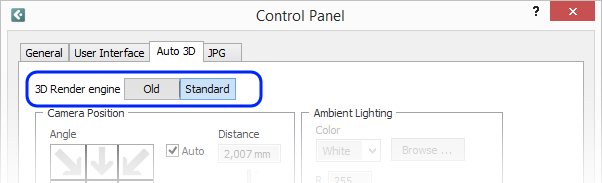
On the Auto 3D tab in the Control Panel, you can check whether the Auto 3D buttons render via the render server or not. If the 3D render engine is set to Standard, the render server is being utilized. If the engine is set to Old, the render server is not being used:
On this tab, you will also find all available settings for automatic developing, such as Camera Position and Image Target.
In the toolbar, just to the left of the Auto
3D icons, you will also find a Create
3D walkthrough icon ![]()
Clicking this icon starts a 3D walkthrough from a default position. This position is the same as when you use the Auto 3D buttons for automatic camera development and can be altered in the Control Panel. Click the link below to read more about Configura Walkthrough.
>> Read more about Configura Walkthrough
You can also render images straight from the Walkthrough where the two buttons also render using the render server.
|