
Use the Part Tagging function in CET Designer to add tags to articles in the drawing and to categorize them. These categories are then shown as individual items in the calculation dialog. This will enable you to view separate price information for, for example, certain product groups.
To add tags and create categories, follow the steps below:
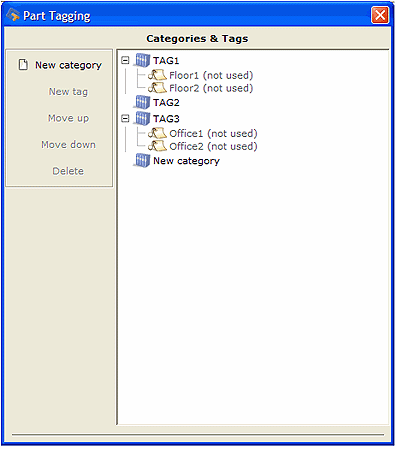
From the Tools menu, select Part Tagging. The Part Tagging dialog opens (see Figure 1).
Either select one of the predefined tag categories (TAG 1, TAG 2 or TAG 3) and use the tags that already exist, or create new by selecting New category and New tag. (Note: Leave the TAG 1, TAG 2 and TAG 3 tag categories. If you remove or change the names of these tags, your tags will not be available in any other program besides CET Designer).

Figure 1
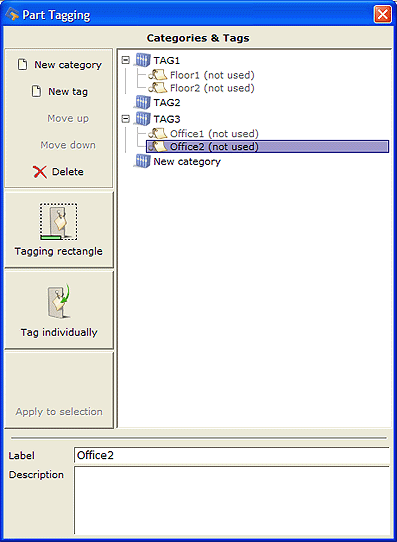
At the bottom of the dialog, enter a Label and/or Description for the tag (see Figure 2).
Click either the Tagging rectangle, Tag individually or Apply to selection button (see Figure 2) to apply the tag in the 2D view of the drawing area:
Tagging rectangle - After clicking this button, click and drag in the 3D viewing area to draw a rectangle. All objects in the rectangle are attached to the tag.
Tag individually - After clicking this button, click on the components that should have the tag attached.
Apply to selection - after clicking this button, all selected components will have the tag attached.

Figure 2
Once the tags have been applied in the drawing area, you will automatically get to the TAGS viewing mode at the bottom of the 3D view (see Figure 3). The tagged component will appear blue.

Figure 3
Go to the Calculations dialog and click the Groups button. In the dialog that opens, select the category and choose Turn on.
|
Note: A smaller rectangle always take precedence over a larger one when it comes to determining which tag an object belongs to. |