Help point

By placing a help point in the drawing area, you can set a point that other components attach to.
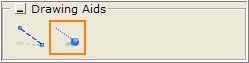
 

help_point.gif

Figure 1


Example:

You want to place a help point on a wall, 40" from one end.

Follow these steps:

  1. Select the Help point component, under Drawing Aids on the Wall Drawing tab (see Figure 1).

  2. Move the mouse cursor to the end of the wall (it will automatically find the end point) and click.

  3. In the input box that appears, enter 40".

  1. Confirm this value, and enter the angle of the help point by pressing one of the arrow keys on the keyboard. The blue help point is now visible in the drawing area. You can now attach another wall to this point.


Note: Drawing aids are not visible on a printout, but are only meant to assist in drawing.