
A ceiling grid light system is a very useful component for effect lighting (see example in Figure 1 below).
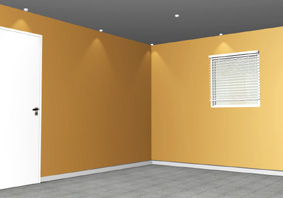
Figure 1
To place a ceiling grid light, follow these steps:
Create a ceiling.
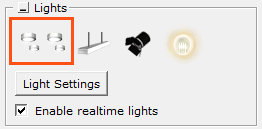
Click the 3D tab and select the Ceiling grid light component (see Figure 2).
Move the mouse pointer to the drawing area. A box with a light in each corner is attached to the mouse pointer. This is the grid.
Click once to set the starting point of the grid. Release the mouse button.
Stretch the grid horizontally and vertically to the desired size.'
Click once to set
the ending point of the grid.
 |
 |
|
Figure 2: The Ceiling grid lights icon |
|
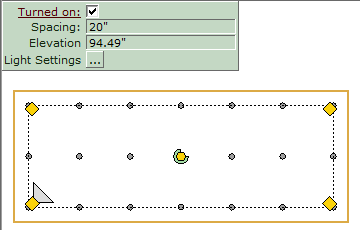
Figure 3: A Ceiling grid light in the 2D view, with quick properties box. |
After inserting a ceiling light grid, you can make adjustments in the Light Settings dialog.