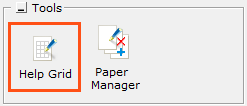

To structure a sheet's layout in the paper view, use the function Help grid. You can then place a grid of optional size and with optional number of rows and columns on the sheet. All components in the Tools (paper) and Drawing (paper) tab can snap to the sides of the Help grid.

Figure 1
To add a Help grid, follow these steps:
Click the icon Help grid in the Tools field on the Tools (paper) tab (see figure 1).
Move the mouse pointer to the sheet. A rectangle follows.
Click once on the sheet to set the starting point for the Help grid.
Move the mouse pointer diagonally over the sheet and click when the grid reaches the desired size. A grid with two columns and two rows is now visible on the sheet.
Make desired settings (read more below).
Note:
|
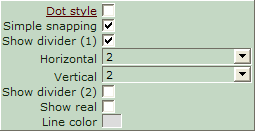
It is possible to make settings when you have placed a Help grid on the sheet. Click the grid and a green input box is displayed (see figure 2).

Figure 2
You now have the following options:
Dot style: Select the check box to hide the help grid's lines and to only show dots.
Simple snapping: Select the check box to make it possible to just snap components to the yellow snap points in the Help grid.
Show divider (1): Select the check box if you wish to change the number of rows and columns in the grid. Choose the desired number of rows and columns in the drop down menu.
Show divider (2): Select the check box if you wish to add a grid in the existing grid. Choose the desired number of rows and columns in the drop down menu.
Show real: The Help grid will be printed in set size. Select the check box and set desired size in the input fields that appears.
Line color: Click the icon to choose color of the grid's lines.