
To draw two-dimensional lines in CET Designer, go to 2D Lines on the Tools component tab (see Figure 1) or the Lines on the Drawing (paper) component tab in the paper view. Read more below on how to use the different line types.
Help line and help point can also be found in the field Drawing aids on the Wall drawing component tab.
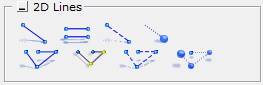
Figure 1
If you want to position a line with a certain length, follow these steps:
Select the Line component from the component tab and place it in the drawing area by clicking once.
Enter the desired length in the input box that appears.
Enter the angle for the wall, either by moving the mouse pointer in the desired direction or by entering an exact value. Confirm by clicking.
If you want to position a double line with a certain length, follow these steps:
Select the Double line component from the component tab and place it in the drawing area by clicking once.
Enter the desired length in the input box that appears.
Enter the angle for the wall, either by moving the mouse pointer in the desired direction or by entering an exact value. Confirm by clicking.
If you want to position multiple lines, follow these steps:
Select the Multiple lines component (Expert user level) from the component tab and place it in the drawing area by clicking once.
Enter the desired length in the input box that appears.
Enter the angle for the wall, either by moving the mouse pointer in the desired direction or by entering an exact value. Confirm by clicking.
Repeat these steps until you have all the lines you want.