
The best procedure is to name and save your drawing from the start by selecting Save As. When you have created the drawing, you only need to click Save occasionally while you work and when you are finished.
Before you begin drawing, it is recommended that you choose Save As. There may also be times when you'd like to save your drawing under a different name.
Follow these steps:
Go to the File menu and select Save As. The Save Drawing dialog box opens (see Figure 1 below).
Browse to the location where you wish to save your drawing. You can sort your files by date or name by clicking one of the icons in the top right corner (see Figure 2 no 1). You can also choose how to view your files by clicking one of the icons in the top right corner (see Figure 1 no 2).
Name/rename the drawing in the File name field.
Click the Save button.
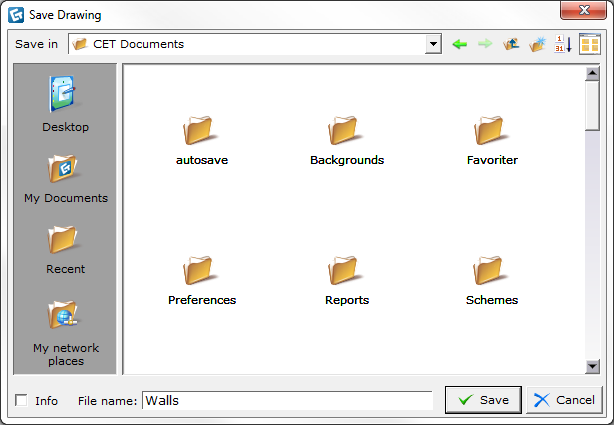
Figure 1
Note: While you are working with a drawing, you should occasionally save your drawing. Besides saving from the menu, you can also save by: A. Clicking the Save button on the toolbar. B. Using the shortcut: Ctrl+S. |
You can choose how to display your drawings in the Save Drawing dialog box. The following options can be selected:
- Sort files by name - You can choose to order the files by name. This button is only visible when the files are ordered by date (see Figure 2 no. 1).
- Sort files by date - You can choose to order the files by date. This button is only visible when the files are ordered by name.
- Choose view - You can choose how to view your favorites. Click the button in the top right corner and choose desired option in the drop down menu (see Figure 2 no. 2).
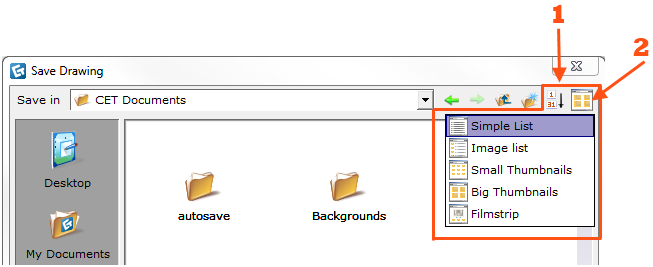
Figure 2