Organizing the sheets

Miniatures of the sheets you have added are presented at the bottom of the paper view. Features for adding, removing, load and save sheet are also found here.

Click the miniature that you wish to edit, the miniature then turns green (see figure 1). You can change the order the sheets are displayed in by clicking one sheet and then drag it to desired position in the line with the mouse pointer.
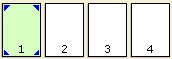
 

pappersark.gif

Figure 1


Besides changing the order of existing sheets you also have the following options:


  • Insert a new paper: Creates a new, empty, sheet (see figure 2).

sätt_in_ett_nytt_papper.gif

Figure 2


pagesetup.gif

Figure 3

  • Page setup dialog: Opens the page setup dialog where the paper size, margins etc can be changed (see figure 3).

  • Load paper from file: Opens a paper from a file (see figure 4).

läs_in_papper_från_fil.gif

Figure 4

Rotate_paper.gif

Figure 5

  • Change paper orientation: Changes the sheet's orientation between landscape and portrait (see figure 5).

  • Copy selected paper: Adds a copy of the currently selected paper as a new page (see figure 6)

copy.gif

Figure 6

removepaper.gif

Figure 7


  • Remove selected paper: Removes the selected sheet (see figure 7).

  • Save selected paper: Saves the selected sheet (see figure 8).

spara_valt_papper.gif

Figure 8

EnableDisable.gif

Figure 9

  • Enable/Disable selected page: Sets if the sheet is to be included in the print out or not (see figure 9).


Note:

  • Tip: you can also organize your sheets from the Paper manager, accessed by clicking the icon Paper manager in the Tools field on the Tools (paper) tab.

  • Settings made in the paper view is only valid for the sheet you are currently working with.

  • Right click on a miniature and you will find the functions Disable page, Change to landscape, Page setup etc there as well.