
When you choose a new drawing area in CET Designer, a new floor is automatically laid out. You can customize the standard floor by, for example, changing the floor material (see floor with an alternative texture in Figure 1 below), extent or size.
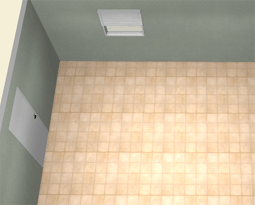
Figure 1
If you want to change or remove the floor, follow these steps:
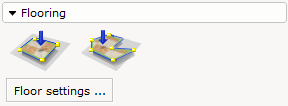
Figure 2
Click the Floor settings button in the Flooring field on the Wall drawing tab.
The Floor dialog box opens (see Figure 3).
Make your changes in the Floor field. You have the following options:
Show floor: Deselect the checkbox if you wish to hide the floor in the 3D drawing area.
Auto expand: Deselect the checkbox if you do not want the floor to automatically adjust to the area where you place the components in the 3D drawing area. New options will appear in the dialog box.
Extend floor: Set the margin of the floor, i.e. how much extra floor that should be visible compared to the components placed in the 3D drawing area.
Minimum size: Set the minimum size of the floor.
Save material as default: The material that are present used will be set as default material when a new drawing is created.
If you deselect the Auto expand checkbox you will have the following options instead:
X: Set the position of the floor in the x-axis in the drawing area.
Y: Set the position of the floor in the y-axis in the drawing area.
With: Set the with of the floor.
Depth: Set the depth of the floor.
You can also change the material of the floor by clicking the Material button.
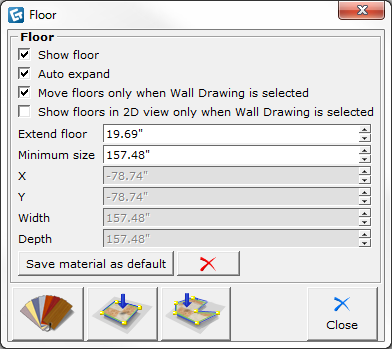
Figure 3
Note: You can choose just to change the appearance of parts of the floor. Read more about this in the topic Adding flooring. |