
QTVR stands for QuickTime Virtual Reality. The QTVR software was developed by Apple Computer. Amongst other things, it can generate and play movie sequences. The combination of Configura and QTVR allows you to make a movie sequence in an environment which you have created on the drawing area. The movie is produced in Configura and can easily be distributed to your customers by email. The only prerequisite is that the recipients have QuickTime Player installed on their PCs, so that they can play the movie. You can download QuickTime Player from www.quicktime.com.
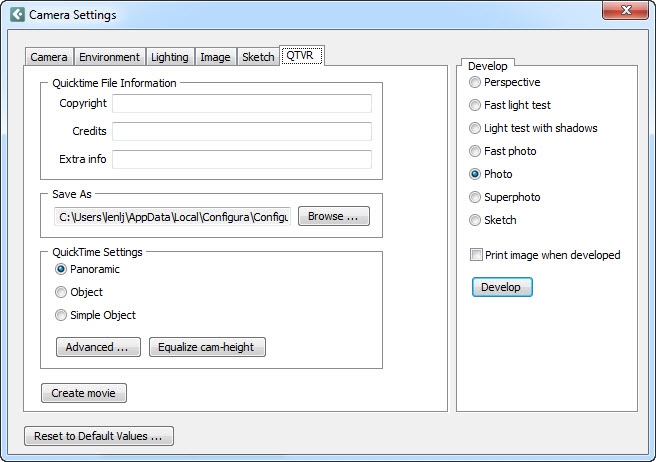
Figure 1 - The QTVR tab
In the QuickTime File Information field on the QTVR tab, there are three text boxes:
In the Copyright text box, you specify who owns the copyright to the file.
In the Credits text box, you enter the name of the person who made the movie.
In the Extra info text box, you can enter, for example, the quotation number, date and other administrative information.
This information is saved and sent with the file.
In the Save As field, click on the Browse button and go to the folder on the hard disk where you want to save the file.
In the QuickTime Settings field, there are three radio buttons. Using these buttons, you can choose what type of movie you want to make.
The options are:
Panoramic
Object
Simple Object
You create a panoramic movie from a specific point. In the program, the point is your camera which rotates half a turn around its own axis. A panoramic movie consists of one large image, which does not have the same quality as the other options. However, panoramic movies can be produced quickly and have relatively small files.
Follow these instructions to create a panoramic movie:
Enter the file information in the three text boxes under the heading QuickTime File Information.
Click on Browse. The Save As dialog is displayed. Choose the folder on the hard disk where you want to save the movie file, enter the file name and click on Save.
Choose the option Panoramic.
Enter your Advanced settings, if you have any.
Click on the Equalize cam-height button, if you want your camera to move on a level plane.
Click on Create Movie. The QuickTime Movie window is displayed.
Go to the folder on your PC where you saved the movie file and double-click on the file's icon to play the movie.
Both types of object movie (Object and Simple Object) differ from panoramic movies in that the camera rotates around a central point, instead of round its own axis. In the program, this central point is the camera's target. The rotation can be compared with dancing in a circle round a tree: you fix your eyes on the trunk of the tree and keep your eyes on it as you dance round. Object movies, in contrast to panoramic movies, are made up of a number of separate images taken in a series of steps round the object both horizontally and vertically (Object). Therefore, the movies take longer to produce and the file size is considerably larger.
To create an object movie, follow the instructions below:
Enter the file information in three text boxes under the heading QuickTime File Information.
Click on Browse. The Save As dialog is displayed. Choose the folder on the hard disk where you want to save the movie file, enter the file name and click on Save.
Choose one of the options Object and Simple Object.
Enter your Advanced settings, if you have any.
Click on Create Movie. The QuickTime Movie dialog is displayed.
Go to the folder on your PC where you saved the movie file and double-click on the file's icon to play the movie.