
Whenever a render task is sent to the render server, the Render Queue window opens. At the bottom left, is a preview of the current render job. The center part of the window is a viewing area where the image that you have selected in the list to the left is shown. To the right are controls for post-processing.
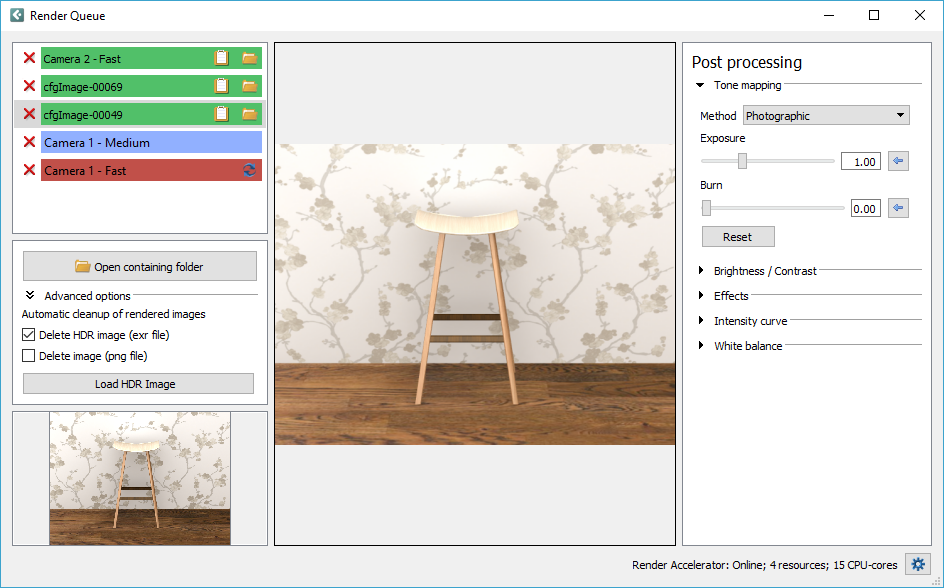
Blue row indicates rendering in progress.
Green row indicates that the rendering was successful and that the image is finished.
Red row indicates that something went wrong during rendering.
You can hover with the mouse over a rendering in progress in the list (blue row) to see which computer is accelerating the rendering.
To the right on each green row are two options:
 |
Copy to clipboard: |
Copies the rendering to the clipboard. |
 |
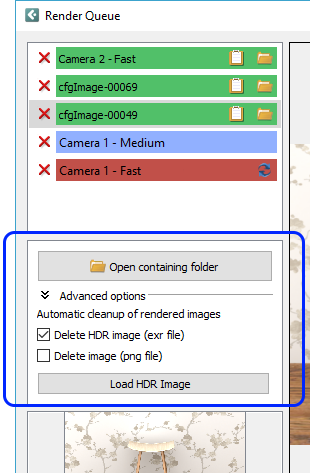
Open containing folder: |
Opens the folder that contains the selected rendering. |
You can use the red removal X to remove a render job from the render queue.
On the left in the Render Queue window is an Advanced Options section. Here, you can enable automatic cleanup of rendered images from the render queue and the render queue folder. You can choose to delete either the .exr file, the .png file, or both. The cleanup will take place when you delete a render job, or when you close the Render Queue window. Note that the Delete HDR image (exr file) is selected by default.
This section also holds a button named Load HDR image. If you have loaded an HDR image manually with this button, it will not be removed from the render queue folder during cleanup; only from the actual render queue window. Loading an HDR image into Configura enables post processing, either to correct / adjust an image or applying special effects.
Note that images that have been removed from the render queue folder cannot be restored.
|
