
On the Camera tab in the Camera Settings dialog, there is an Advanced button. From here you can open the Advanced Camera Settings dialog. In this dialog, you can e.g. check the options in the Transparency field if you want to develop transparent 3D images. These options can be used, for example, together with the Perspective developing option to show something not visible in a normal 3D image.

Figure 1 - Advanced Camera Settings dialog
Example:
You want to be able to see components which are in another room. You want to be able to see through a wall.
To do this, follow the instructions below:
Click on the Advanced button on the tab Camera.
In the Advanced Camera Settings dialog, check the box Transparent.
Click on OK or Apply.
In the Develop field in the Camera Settings dialog, click on the button Develop.
In the Postprocess field, you can postprocess 3D images using either of the two methods Depth of field or Lens flare. The different alternatives, combined or on their own, give the developed 3D image an authentic feeling.
|
Note:
|
Depth of field makes the focal point of the camera coincide with the object that the camera's target point is placed on. With depth of field checked the field Aperture is activated and you can choose the aperture of the camera. Figure 1 is made without depth of field with the target point placed on the front chair. In Figure 2, the depth of field is chosen. The target point is on the front chair and aperture is set to 1.8.
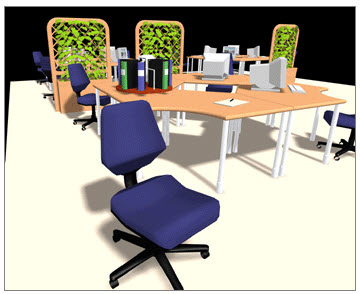
Figure 1
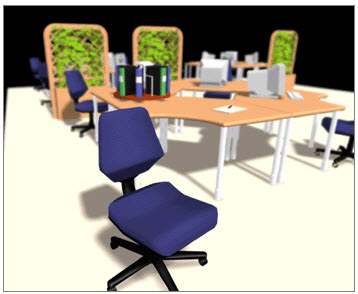
Figure 2
With Lens flare checked, the light sources you might have placed on the drawing area will give reflections on the developed 3D image. Figure 3 is made without lens flare and Figure 4 with lens flare.
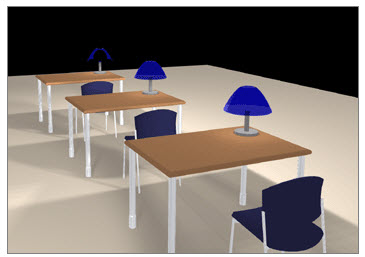
Figure 3
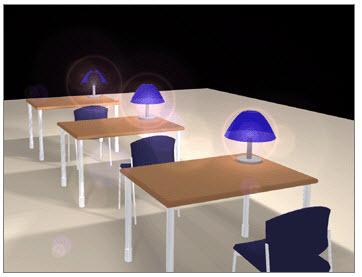
Figure 4