
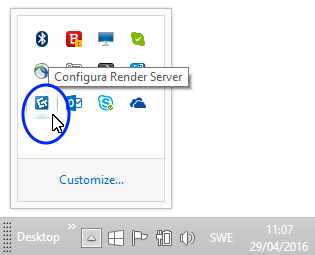
To download the render server, click the yellow Download Render Server Installer button above. You are then redirected to the Configura website where you have to click this yellow button one more time. Save the .msi file and then install it. The installation is quick and will start the render server automatically at the end. Once the installation has completed, you will notice a little tray icon in the notification area down by the clock on your screen:
Tip:
In case your notification
area does not display the render server icon, you can start it
manually by pressing the |
Clicking the tray icon brings up the controls for the Render Server:
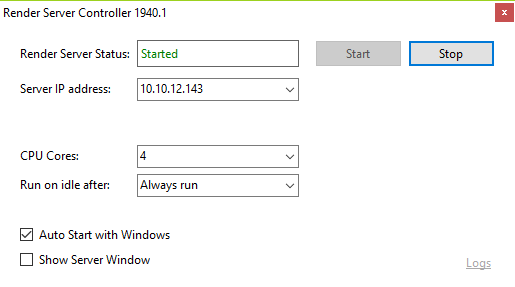
Here, you need to make sure that the Server IP address is within the same subnet as your client(s), otherwise no clients will be found. We also recommend that you select the Auto Start with Windows checkbox to make sure that your computer can help with render jobs when it is idle.
Note:
If given a large amount of render jobs, the render server will consume a lot of computing power. Using the computer at the same time will then be slower than normal. |
Related pages:

 key, locating the CET Render Server Controller and double-clicking
it. This launches the render server and the tray icon should now
be displayed in the notification area.
key, locating the CET Render Server Controller and double-clicking
it. This launches the render server and the tray icon should now
be displayed in the notification area.