
In the bottom left-hand corner of the Material/Color Change dialog, in the Apply to field as shown below, you will find a drop-down menu. Here, you can select the components to which you want to apply the material or color change. It can be one component, a group of components, components in a selected position or all components of the same type in the drawing area.
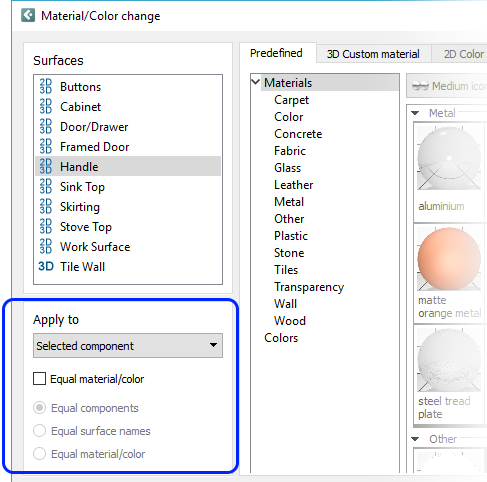
Figure 1: Apply to field.
Selected Component changes a single component which you have selected.
Checking the Equal material/color option will apply the change to all surfaces of the component that have the same material/color as the selected surface. For example, having the box checked while changing a birch table top would also change the modesty panels mounted on the table, since they are birch too.
Group changes a group of components. The components must make up a temporary group.
Position changes those components which are enclosed and defined as a position.
All changes all similar components in the drawing area. For example, this could be all the tables or all the doors in a large drawing.
Selecting Group, Position, or All activates the following options:
Equal components changes the selected surface on all equal components in a Group / Position / Drawing, for example the seats on all chairs with the same product.
Equal surface names changes the selected surface on all components in a Group / Position / Drawing, for example the surface Seat on all chairs, regardless of their product code.
Equal material/color changes all surfaces on components in the Group / Position / Drawing that have the same material/color as the selected surface.
After making your selections, use the buttons in the lower right corner to apply them. Please note that OK closes the dialog, while Apply keeps the dialog open.