
Double-clicking a light in the drawing brings up the Light Settings dialog where you can adjust the light and its properties.
Note:
|
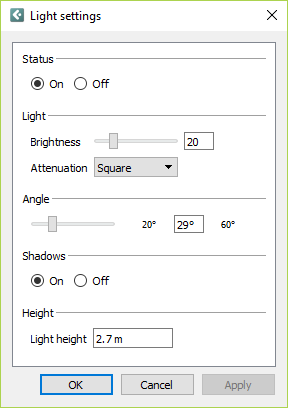
Example of a Light settings dialog in
Configura
In the Status field, use the radio buttons to turn the light On or Off. All lights in the Tools tab default to being on.
In the Light field, you can adjust the how much light the component should cast.
Use the Brightness slider to set a value between 0 and 100.
The Attenuation option controls the amount of light being cast depending on the distance to the actual light source and the options available are None, Linear, or Square. Adjusting the attenuation is an alternative to increasing the overall brightness, which could make the light close to the lamp much too bright.
Having placed a Ceiling Spotlight Grid, this is where you specify the Column spacing and Row spacing.
Having placed a Ceiling Spotlight or a Ceiling Spotlight Grid, use the Angle slider to control how narrow or wide the light cone should be.
In the Shadows field, use the radio buttons On or Off to decide whether the light should cast shadows or not.
Lights that can be aimed at something, such as the spotlight, have two height settings; one for the actual Spotlight and one for the Target. They also have a Height range where it is possible to specify the allowed range for the light.
Other lights, for example the levitating light source, only have a Light height, which is their elevation.
A third possibility, as seen with the Fluorescent strip for example, is to set a Ceiling height and a Light height. The gap between them will then show a visible cord.