Placing a Camera

Images that are to be printed or used in a presentation are normally created manually in Configura, using the Camera component found under the 3D heading at the bottom of the Tools tab.


To place the camera in the drawing area, follow these steps:

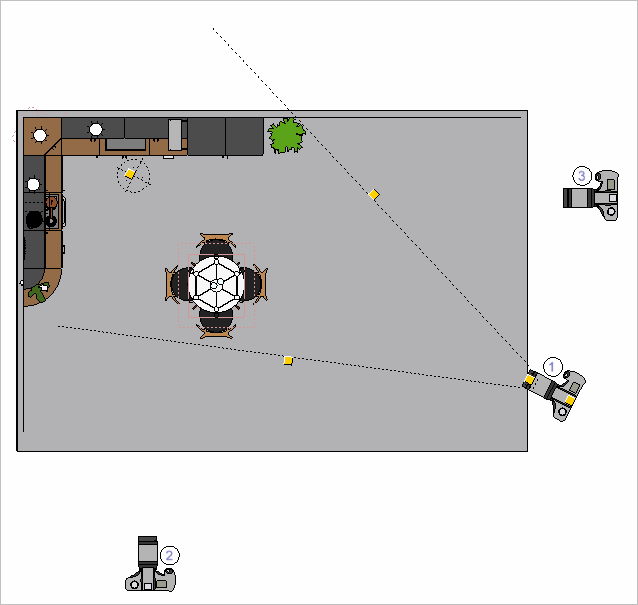
  1. Select the Camera component from the Tools tab, by clicking on it and dragging it to the drawing area.

  2. Click the camera in position in the drawing area.


You can set up multiple cameras in your drawing. Each camera is numbered to make it easier to identify:


Note:

  • After placing one or more cameras in the drawing area, proceed to the Render & Camera Settings. This is done by:

    • double-clicking a camera (opens the Render & Camera settings dialog with the selected camera active)

    • right-clicking a camera and selecting Render & Camera settings from the menu (opens the Render & Camera settings dialog with the selected camera active)

    • clicking the Open Render & Camera Settings icon in the tool bar (opens the Render & Camera Settings dialog with the selected camera active. If you click this button without having first selected a camera, the dialog will open with the Auto camera active).