
The Ceiling spotlight and the Ceiling spotlight grid let you add individual or multiple recessed spotlights to create a sleek and modern look in the space you are designing.
The Ceiling spotlight is used for placing one spotlight at a time, while the Ceiling spotlight grid places multiple spotlights evenly distributed in one go.
To place an individual Ceiling spotlight, follow these steps:
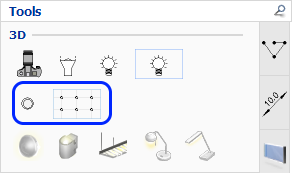
On the Tools tab, click to select the ceiling spotlight and move it to the drawing area.
Click once to place the ceiling spotlight in the desired location. A new ceiling spotlight component is now available on the mouse cursor.
Repeat step 2 if you want to add more ceiling spotlights to your drawing.
When you are finished, press the Esc key or move the cursor outside the drawing area to release the component.
To place a Ceiling spotlight grid in your drawing, follow these steps:
On the Tools tab, click to select the ceiling spotlight grid and move it to the drawing area.
Click once to set the starting point, keep holding the left
mouse button down and start moving the mouse cursor diagonally to
form a square or rectangle:
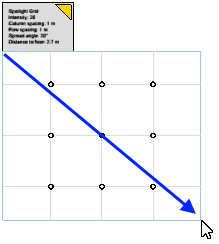
When reaching the desired size, release the mouse button. A new ceiling spotlight grid component is now available on the mouse cursor.
Repeat steps 2-3 if you want to add more ceiling spotlight grids to your drawing.
When you are finished, press the Esc key or move the cursor outside the drawing area to release the component.
Double-clicking a ceiling spotlight or the ceiling spotlight grid label brings up the Light Settings dialog where you can make adjustments.
Note:
|