
You can rotate the majority of the components in the program.
To rotate a component in the drawing area, follow the instructions below:
In the drawing area, activate the component, by clicking on it. Place the mouse pointer on one of the component's snap points.
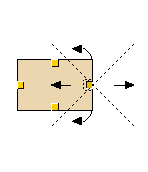
Click and hold the mouse button. A cross made out of dashed lines and four arrows appears. The two curved arrows indicate the directions in which the component can be rotated and the two straight arrows show how it can be stretched or shrunk.
Hold down the mouse button and drag the mouse pointer in the direction in which you want to rotate the component (following one of the curved arrows).
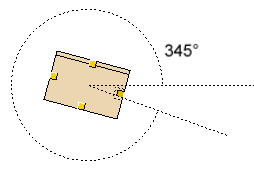
When you start rotating the component, a protractor appears which shows the angle of the rotation. The component also becomes transparent.
Release the mouse button when the component has been rotated to the desired position.
 |
 |
|
Note: You can choose in advance the angle through which the component will rotate. Place the component in the drawing area and choose Set Angle from the Angle menu. A dialog with the same name appears. Under Step, select the desired angle step and confirm with OK or Apply. |
The instructions above apply to components which are already positioned in the drawing area. You can also rotate components when you position them in the drawing area.
Follow the instructions below:
Select the component you want to position on the drawing area.
Click the component in position on the drawing area, and hold down the mouse button.
Rotate the component to the position you want.
Release the mouse button.