
Under the heading Import Drawings and Images, the feature Import drawing/image as background is found (Figure 1). Here it will be used for importing an image.
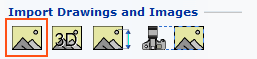
Figure1
The feature Import drawing/image as background also enables you to import existing images to the drawing area.
Proceed as follows:
Select the feature Import drawing/image as background and position it on the drawing area. The dialog Drawing/Image Import Settings is displayed.
Click on the Browse button to select the desired file.
When you have found the right file, make sure that the Scanned drawing/image box is not checked.
Determine the image size in the drawing area by selecting a value next to Scale (%).
Click on OK or Apply.

Note:
|
When you have placed an image in the drawing area you can move the image by clicking between the dotted line and the picture. Hold the mouse button and "drag" the image to desired position on the drawing area.
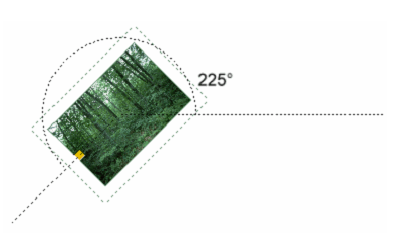
If you run InstantPlanner in advanced graphics mode, you will also be able to rotate the image on the drawing area. Click the image and "drag" the image around by its snap point.
Note:
|
After inserting an image, you can use the image measuring tool. Say that you have taken a screenshot of a drawing in, for example, a PDF document and then pasted it into InstantPlanner. Then you want to make sure that the image has the right dimensions and scale. To get a control measurement and adjust your image accordingly, follow these steps:
Place the requested image in the drawing area.
Click the Image measuring
tool, which is located in the Import
and Export tab. Move the cursor to the drawing area.

Click to set a starting point, move the cursor in the desired direction and click to set the end point. The Scale image dialog opens. Here you can see the measured distance.
Specify the actual distance or the desired scale according to the original drawing. Click OK or apply to confirm. The imported image is adjusted according to the new values.
