
Under the heading Ceiling, you will find a rectangular ceiling that can be used plain or with integrated lights.
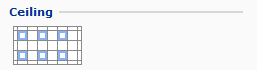
You place ceilings in the same way as line drawing components. You can also stretch and rotate ceilings and change their color in the plan view as well as in 3D.
To place a ceiling, follow these steps:
Select the Ceiling component from the House Components tab and move it onto the drawing area.
Click once to set the starting point and then begin to move the mouse to the side. Either keep moving until the ceiling is the correct length, or enter an exact length in the blue input box. Click again when the length is correct.
Now, start pulling the mouse down. Either keep moving until the ceiling is the correct depth, or enter an exact depth in the blue input box. Click again when the depth is correct. The ceiling is now in place.