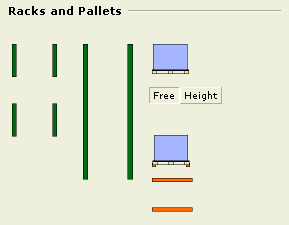

Under Racks and Pallets (see Figure 1 below) you will find the key components for setting up drive-in/push-back systems.

Figure 1: Racks and Pallets.
In order to build a drive-in/push-back rack system in InstantPlanner, proceed as follows:
Select the desired database and customize your system in the Design Specifications dialog.
Do the required pre-sets on the tab below.
Select the Rack component and click the component in position in the drawing area.
Continue to click and hold the left mouse button to thereby adjust the width of the system (the width and the depth are displayed in a yellow measurement box when you start dragging). Release the mouse button when you have the desired width and drop the component.
Now stretch the system in the other direction to adjust the depth. Click on the yellow snap point and drag to the desired depth.
The pallet, beam or rail components can be snapped to the system if required.
To read more about the Drive-In/Push-Back tab, click here.