
To distribute components in the drawing area you can use the features found by clicking Align/Distribute in the Arrange menu. Distributing components means placing them the same distance from each other.
Do as follows to distribute components in the drawing area:
Group the components you wish to distribute.
Click on the Arrange menu and choose Align/Distribute. The dialog Align/Distribute is displayed (see Figure 1).
Select the desired alternative within the Distribute field.
|
Note:
|
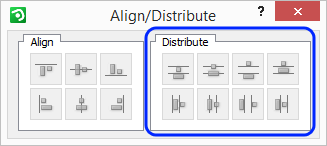
Figure 1
There are eight different ways to distribute components:
Click the first icon from the left in the upper row to distribute grouped components upwards (see Figure 2).
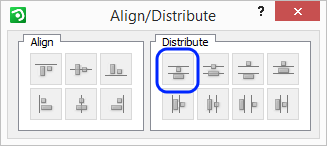
Figure 2
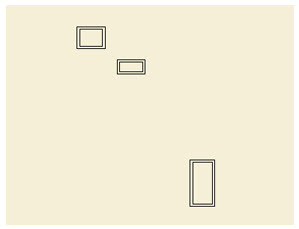
The distance between the grouped components' upper edges will then be the same (see Figure 3).
 |
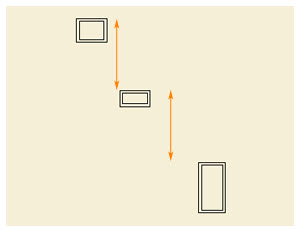 |
| Before
Figure 3 |
After |
Click the second icon from the left in the upper row to distribute the grouped components' centers vertically (see Figure 4).
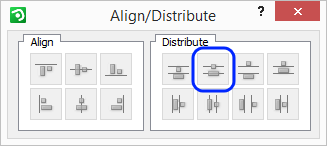
Figure 4
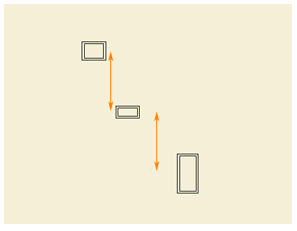
The distance between the grouped components' centers will then be the same (see Figure 5).
|
 |
| Before
Figure 5 |
After |
Click the third icon from the left in the upper row to distribute the grouped components' edges vertically (see Figure 6).
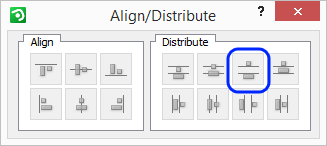
Figure 6
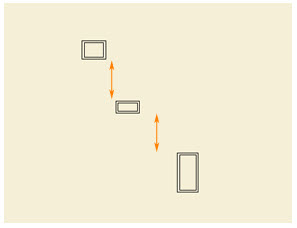
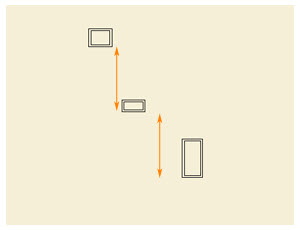
The distance between the grouped components' edges will then be the same (see Figure 7).
|
 |
| Before
Figure 7 |
After |
Click the fourth icon from the left in the upper row to distribute the grouped components downwards (see Figure 8).
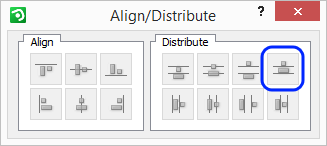
Figure 8
The distance between the grouped components' lower edges will then be the same (see Figure 9).
|
 |
| Before
Figure 9 |
After |
Click the first icon from the left in the lower row to distribute grouped components to the left (see Figure 10).
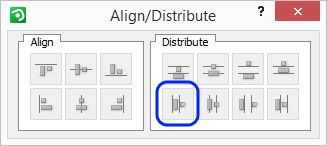
Figure 10
The distance between the grouped components' left edges will then be the same (see Figure 11).
 |
 |
| Before
Figure 11 |
After |
Click the second icon from the left in the lower row to distribute the grouped components' centers horizontally (see Figure 12).

Figure 12
The distance between the grouped components' centers will then be the same (see Figure 13).
|
 |
| Before
Figure 13 |
After |
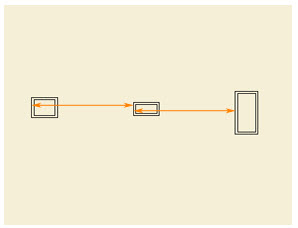
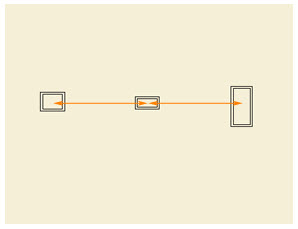
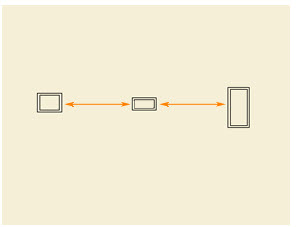
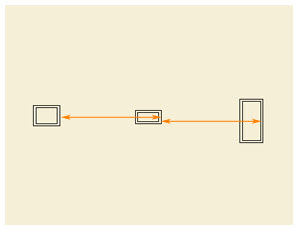
Click the third icon from the left in the lower row to distribute the grouped components' edges horizontally (see Figure 14).
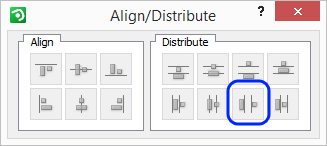
Figure 14
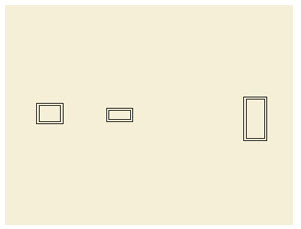
The distance between the grouped components' edges will then be the same (see Figure 15).
|
 |
| Before
Figure 15 |
After |
Click the fourth icon from the left in the lower row to distribute grouped components to the right (see Figure 16).
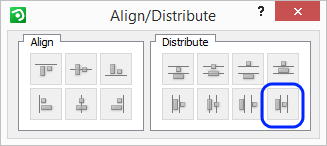
Figure 16
The distance between the grouped components' right edges will then be the same (see Figure 17).
|
 |
| Before
Figure 17 |
After |