You can easily render images using the buttons Auto 3D (Preview) and Auto 3D (Detailed) in the toolbar. They will both render an image from an automatic camera position (defined in the Control Panel). The difference between them is a matter of image quality and level of detail.
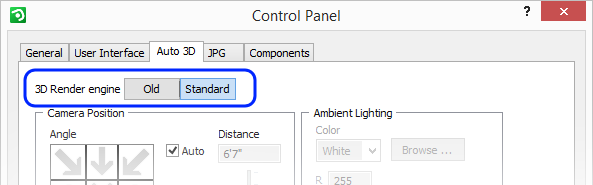
When InstantPlanner runs in advanced graphics mode, the default setting for the Auto 3D buttons is to render images via a separate render server. On the Auto 3D tab in the Control Panel, you can check whether the Auto 3D buttons render via the render server or not. If the 3D render engine is set to Standard, the render server is being utilized. If the engine is set to Old, the render server is not being used:
On this tab, you will also find all available settings for automatic developing, such as Camera Position and Image Target.
So, back in the main window, these buttons are available from the toolbar:
|
|
|
|
|
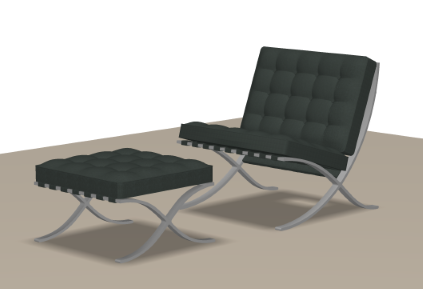
The Auto 3D (Preview) option is a great way of quickly developing a scene from the automatic camera position. This option is fast and displays some lights and shadows as well as textures*. If you don't have a lot of time to spend on rendering, you might find that the quality of these renderings are quite sufficient. Example: |
|
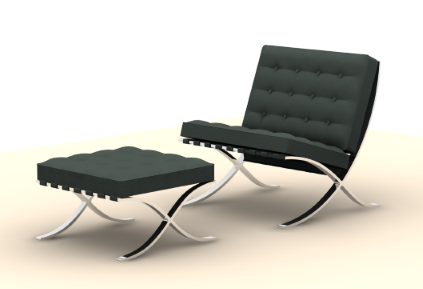
The Auto 3D (Detailed) option also develops from the automatic camera position and generates an image with higher quality when it comes to contours, lights, shadows and textures. It does, however, require more developing time. kkkkkkkkkkkkkkkkkkkkkkkkkkkkkkkkkkkkkkkkkkkkkka sdfd Example: |
|
|
|
|
|
When you click the Auto 3D (Preview) button, a preview window showing your scene opens. The size of the preview window determines the size of your rendering, i.e. if you stretch to enlarge the preview window, the next image you render will become larger. Also in the preview window, you will find a floating toolbar in the bottom right corner. This toolbar contains two tools; Save image and Copy image to clipboard (for pasting into the drawing area or other programs). You can also just use drag n' drop to place the image in the drawing area. *When the 3D Render engine is set to Standard in the Control Panel. |
|
When you click the Auto 3D (Detailed) button, a render task is sent to the render server, and the Render Queue window opens. At the bottom left, you will see a preview of the current render job. The right part of the window is a viewing area where the image that you have selected in the list to the left is shown. Items in the list, and the image in the viewing area, can be dragged n' dropped to the drawing area. |
Adjacent to the Auto 3D icons, you will also find a Create 3D walkthrough button
Clicking this icon initiates a 3D walkthrough from the same predefined camera position as the automatic development does. Follow this link to learn more about Configura Walkthrough:
>> About Configura Walkthrough
|
You can also render images straight from the Walkthrough where both buttons also render using the render server.
|