

The leftmost part of the Photo Lab window is the Photograph setup area. This is where you make your settings and decide how the rendered image should look. In this section, we go through the features in the photograph setup area step-by-step and give you examples on how to use them. It is important to remember, however, that all the different features interact to create a photorealistic image.
Please note that some features are only available when the advanced graphics engine is being used. These features are specified below.
The following render modes are available.
Contour image: provides a contour image with black outlines on the 3D background color of your choice (white by default).
Normal render: generates a rendered image with good quality.
Natural
light (BETA)*: gives you more realistic lighting in your rendered
images through an advanced technique called Global Illumination. This
option is significantly more time consuming than a normal quality
rendering. * Available
with the advanced
graphics engine only.
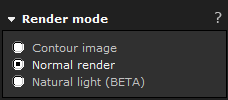
Render mode settings
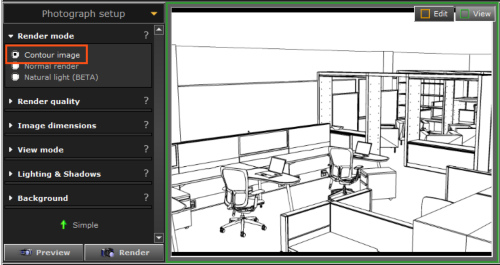
Figure 1: Rendered contour image.
Depending on which render mode that has been selected, there are a number of render qualities to choose from. These are predefined settings mapped to the selected render mode to further decide the appearance of the image. Please note that selecting a higher quality is more time consuming than a normal quality rendering.
The render qualities available are Low, Normal*, High or Custom**. The Custom option lets you set the values exactly as you wish by manually moving the sliders. The right end of each slider is red to indicate that the action is demanding more resources. * The only available quality for render mode Contour image. ** Only available for render mode Natural light (BETA).
Use HDR. High Dynamic Range imaging (HDR) is a technique that is used to balance up images that are under- or overexposed. It is also used to save additional information about a photo, which adds extra quality and depth to a rendered image. If you intend to add post-processing effects it is recommended to turn HDR on. Bear in mind, however, that activating HDR increases the rendering time slightly and consumes a lot more memory.
Anti-alias. This is a technique that is used to make lines and edges look soft and smooth which adds extra quality to your photos. Bear in mind, however, that the more anti-alias you use, the longer the rendering time. Although not consuming extra memory, a rendering with 9X anti-aliasing can in rare cases be up to 9 times slower than a rendering completely without anti-alias.
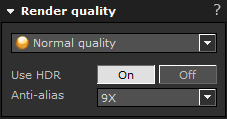
Render quality settings
You can choose from some of the most commonly used image dimensions for your rendering.
Example: 900x600 (3:2)
900x600 is the width and height of the image, measured in pixels.
(3:2) shows the aspect ratio of the image, which means the relationship between the width and the height.
Information about image size in megapixels is also presented. The maximum size is 4 megapixels when HDR is turned on, and 9 megapixels when HDR is turned off.
Choosing Custom dimension from the drop-down menu lets you specify exact image dimensions.

Image dimensions settings
Using different view modes is a way of controlling the visibility of components in a photo by restraining what is displayed. For example, selecting the Wall view mode makes all other components except walls invisible. The TAGS view mode shows all components with a tag attached to them and so on. The selection of available view modes is affected by which Extensions are currently active.

View mode settings
There are several predefined light setups available that differ in the number and the type of light sources used. After selecting a light setup, the settings can be adjusted by moving the sliders to the left or to the right to quantify the effect. Specific numerical values can be typed in to the right of each slider. The selection of available predefined light setups is affected by which Extensions are currently active.
It is also possible to simulate the light at different times of the day by changing the direction and pitch of the sun. The blue square in the circle can be clicked and then stretched and rotated. The pitch determines the height of the sun (90 = shining straight down, 40 = mid afternoon etc).
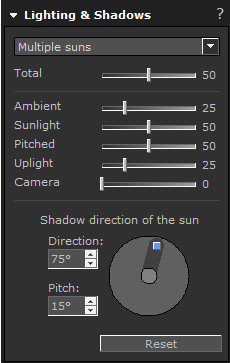
Lighting & shadow settings
Select the Enable realtime lights checkbox just below the photo to see in realtime how the light changes when trying out different settings. It is recommended that this checkbox is deselected when working on larger drawings with many light sources as this will slow down the 3D graphics.
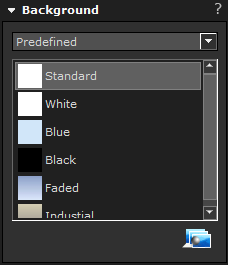
There are several predefined colors available to use as background in images. Each of which can be copied and edited.
By selecting User defined from the drop-down menu and then clicking the icon Add custom color background, virtually any color can be set as background color.
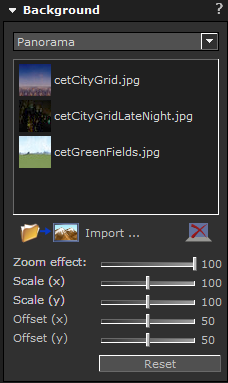
Also included are a few panorama backgrounds*. They are accessed by selecting Panorama from the drop-down menu. Custom images can also be imported and adjusted to fit as panorama background. * Available with the advanced graphics engine only.
 |
 |
|
| Predefined background settings | Panorama background settings |
Clicking the Preview button generates a quick render of the photo to give you an idea of the final result.
Clicking the Render button generates a rendered photo using current settings in the photograph setup area. After clicking this button, it changes into a Cancel button and can be clicked to cancel a rendering in progress.
The actual rendering of a photo occurs in the Render tasks dialog, which opens as a separate window. You can start multiple renderings and they will all appear in the render tasks list.
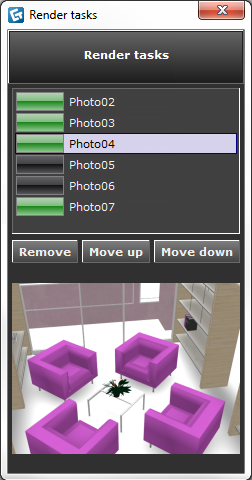
Render tasks list