

The rightmost part of the Photo Lab window is the Post processing area. Here you can find features that let you put that extra effort into your photos by fine tuning them or adding different effects. If you intend to add post-processing effects it is recommended to turn on HDR, which is a feature found in the Photograph setup area.
All post processing is performed on rendered images, so make sure that the photo you wish to work with is displayed in view mode and has a green frame around it.
Please note that some features are only available when the advanced graphics engine is being used. These features are specified below.
Slightly adjusting the colors in a rendering and making them softer or more intense is one way of making your photos stand out.
The Auto levels* attempt to detect and fix imbalances, for example over- or underexposures. Auto levels automatically adjust exposure, brightness and contrast to produce a balanced image with maximum contrast and a good range of color intensities. * Available with the advanced graphics engine only.
You can also use the sliders for Exposure, Brightness, Contrast and Saturation to create the desired effects in a rendered image. When the sliders are moved, the rendered image is immediately updated to show a preview of the new settings. Click Reset to reset all sliders to their original settings.
Exposure: this slider lets you try out different exposure settings, ranging from very underexposed on the left to very overexposed on the right.
Brightness: this slider adjusts the overall brightness in the photo, ranging from very dark on the left to very bright on the right.
Contrast: with this slider you can increase or decrease the contrasts in the image, making objects in the photo more or less distinguishable from other objects and the background.
Saturation:
use this slider to increase or decrease the color saturation in the
image. Moving the slider to the left will make the photo look old
and pale with soft colors, while moving the slider to the right will
result in intense and vibrant colors.
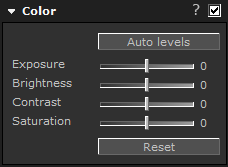
Color settings
* Available with the advanced graphics engine only. Also note that currently, ATI and Intel graphics cards do not fully support focus and blur operations.
Adding a focus or blur effect to a photo can make it more interesting by highlighting or blurring certain parts of the image. To quickly blur the entire image, select the white checkbox to the right of the headline Focus / blur (BETA). Deselect the checkbox to remove the blur. To apply a focus or blur effect to specific parts of the photo, follow the description below.
Set
focus: using this button is the easiest way of controlling
what is going to be in focus and what is going to be blurred in the
photo. It does the same thing as the Focus
slider, but in a graphical way. This is how you use it:
Click the Set focus button. Your rendering shifts from color to black and white and the white checkbox in the headline is automatically selected.
Move the mouse pointer to your photo; a target symbol is now attached to the mouse pointer.
Click the object that you wish to keep in focus. A blue selection
is displayed in the photo, indicating which objects or which area
is in focus (see Figure 1). You can think of this blue selection as
a closed room - everything inside the room is protected from blur.
Use the scroll wheel on the mouse to make the blue selection wider
or narrower. When you are satisfied, move the mouse pointer outside
the photo.
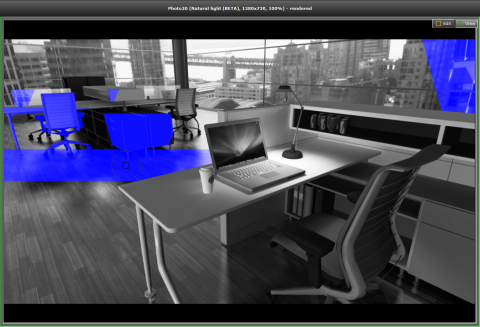
Figure 1: Illustration of the blue
selection that is shown when using the Set
focus feature.
Photo Lab automatically blurs everything that is outside the blue selection.
Use the Amount, Focus depth and Z-fetch bias sliders to achieve the desired blur effect in the photo. Click the Reset button to reset all sliders to their original settings.
Amount: this slider is used to manually specify how much focus or blur that should be added. A low value, perhaps between 10 and 20, helps to add a nice yet subtle effect to the photo. Setting a high value for Amount could make unwanted artifacts appear in the image and is also an expensive operation in terms of time requirement.
Focus and focus depth: the focus slider is used to manually set the distance from the camera to the area that is going to look sharp. The focus depth slider determines how deep the area in focus should be.
Z-fetch bias: with
the z-fetch bias slider you can manually set how objects at different
distances from the camera blur into each other.
Highlight focus: to check where you have put the focus in the image, select the highlight focus checkbox. Your rendering shifts from color to black and white and the blue selection indicating the focus is visible.
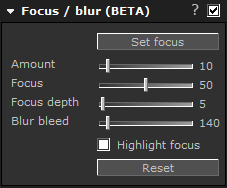
Focus / blur settings
Applying a vignette effect to a photo draws interest to the center as it frames the center portion of the image and fades out towards the edges. Changing the values for Amount, Scale, Roundness and Feather all help to specify how the vignette effect should appear in the photo. Click Reset to reset all sliders to their original settings.
Amount: this slider determines how dark the edges become The further you move the slider to the left, the darker the edges.
Scale: the scale slider determines how far the darkening effect extends in towards the center of the image. Moving the slider all the way to the left limits the darkening to just the corners of the photo, while moving it all the way to the left darkens the entire image, although the center of the image will never appear as dark as the edges no matter how far you move the slider.
Roundness: determines the shape of the vignette. The default value (50) adds a round vignette. Moving the slider to the left creates a horizontal appearance while moving the slider to the right creates a vertical vignette.
Feather: the feather slider is used to soften the edges of the vignette effect. The default value for this slider is 100, meaning that the edges are fully softened from the start.
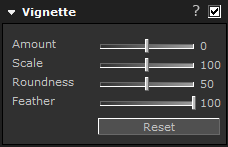
Vignette settings
Noise is used to add a grainy effect to a photo. This effect makes the image look like an old photograph or like a higher ISO has been used. The amount of noise is adjusted by moving the Amount slider from the left (no noise) to the right (much noise). Click Reset to reset the slider to its original settings.

Noise settings
* Available with the advanced graphics engine only.
A rendered image can be cropped to a different size. Clicking the Edit button makes yellow snap points appear at the edges of the photo. Click and drag the snap points to the desired image size. You can also click and drag inside a cropped area to move the crop around to show a different part of the image. Dimensions for the new image size are displayed on the right hand side. To confirm the changes, click Apply, or click Reset to reset the dimensions to the original settings.
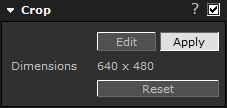
Crop settings
* Available with the advanced graphics engine only.
You can add a company logotope to a rendered image with only a few clicks. The Watermark feature lets you select an image, place it on top of you image, try out different alignments and adjust scale and opacity.
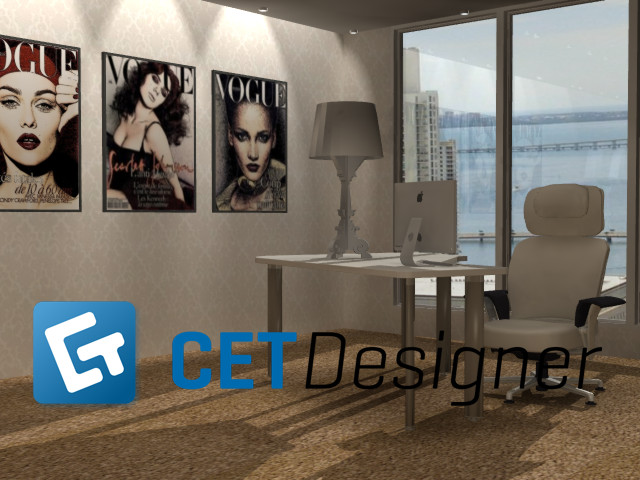
To include a watermark in your photo, follow these steps:
Make sure that the image that you want to work with has been rendered. If not, start by rendering the photo.
In the Post processing area, click the Watermark headline to expand this field. The Watermark drop-down menu displays the five most recently used files on your computer.
Select the file that you want to insert, or click Browse to look for a different file and click Open. Supported file formats are bmp, gif, tif, jpeg and png. The image is placed on top of your rendering.
Click to select alignment in the picture, and use the sliders to adjust Scale and Opacity.
Here you will find some examples on how you can work with the focus and blur feature in your photos. For each photo, you are also given the photograph setup and post processing settings.
In this photo, the photographer has set the focus close to the camera, in this case on the single workstation with a laptop and coffee cup.
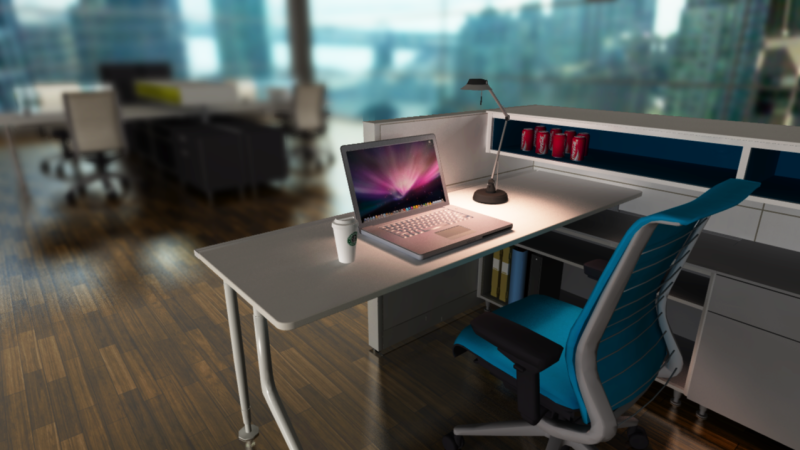
Photograph setup |
|
Post processing |
Render mode: Natural light (BETA) |
|
Color: Exposure 2, Brightness 85, Contrast 19, Saturation 6 |
Render quality: High quality, HDR on, Anti-alias 9X |
|
Focus / blur (BETA): Amount 40, Focus 32, Focus depth 66, Blur bleed 134 |
Image dimensions: 1280X720 (16:9) |
|
Vignette: Not applied |
Lighting & Shadows: Natural lighting, Total 0, Sunlight 0, Camera 0, direction: 30 degrees, pitch: 20 degrees |
|
Noise: Not applied |
In this example, the photograph has set the focus in the middle of the room, in this case on laptop screen and keys.
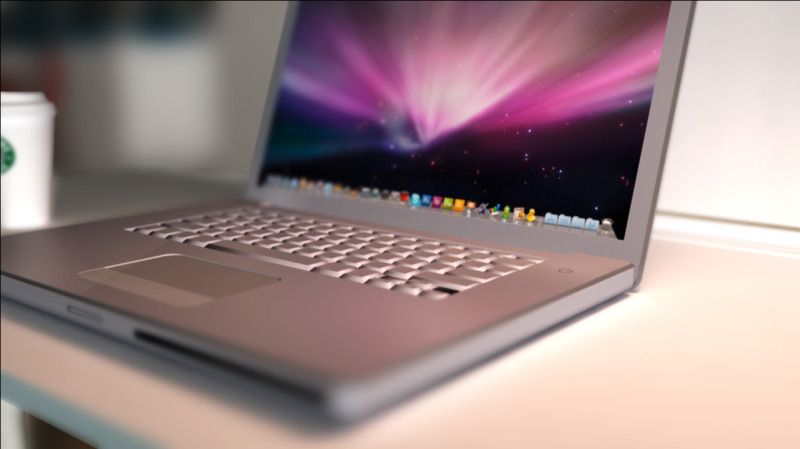
Photograph setup |
|
Post processing |
Render mode: Natural light (BETA) |
|
Color: Exposure -4, Brightness 3, Contrast 19, Saturation 6 |
Render quality: High quality, HDR on, Anti-alias 9X |
|
Focus / blur (BETA): Amount 64, Focus 44, Focus depth 14, Blur bleed 151 |
Image dimensions: 1280X720 (16:9) |
|
Vignette: Not applied. |
Lighting & Shadows: Natural lighting, Total 10, Sunlight 10, Camera 0, direction: 30 degrees, pitch: 20 degrees |
|
Noise: Not applied |
In this picture, the photograph has set a distant focus, here it is on the group of workstations with white chairs.
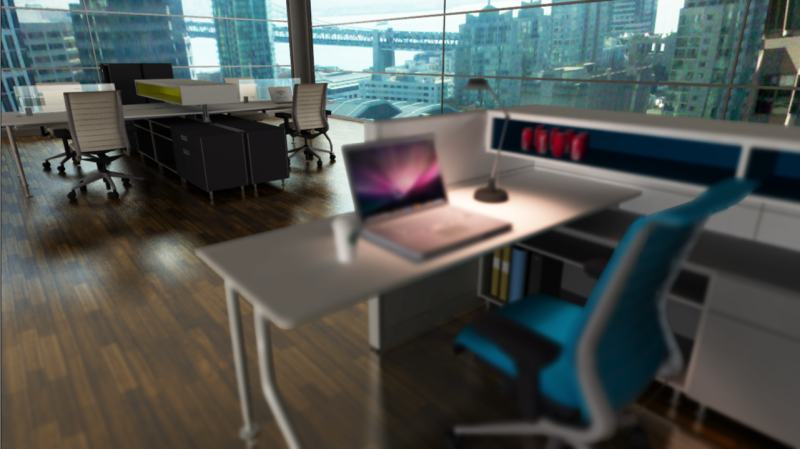
Photograph setup |
|
Post processing |
Render mode: Natural light (BETA) |
|
Color: Exposure 2, Brightness 85, Contrast 19, Saturation 6 |
Render quality: High quality, HDR off, Anti-alias 9X |
|
Focus / blur (BETA): Amount 14, Focus 85, Focus depth 15, Blur bleed 462 |
Image dimensions: 1280X720 (16:9) |
|
Vignette: Not applied. |
Lighting & Shadows: Natural lighting, Total 0, Sunlight 0, Camera 0, direction: 30 degrees, pitch: 20 degrees |
|
Noise: Not applied |
This is a close-up to illustrate that the closer the object in focus is to the camera, the more blurry the image becomes outside of the focus area, just as in real photographs.
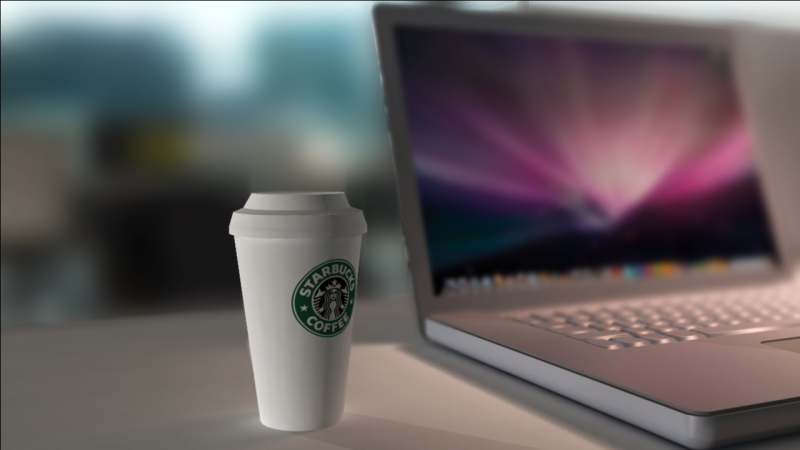
Photograph setup |
|
Post processing |
Render mode: Natural light (BETA) |
|
Color: Exposure 6, Brightness 45, Contrast 11, Saturation 0 |
Render quality: High quality, HDR on, Anti-alias 9X |
|
Focus / blur (BETA): Amount 64, Focus 21, Focus depth 43, Blur bleed 194 |
Image dimensions: 1280X720 (16:9) |
|
Vignette: Not applied. |
Lighting & Shadows: Natural lighting, Total 10, Sunlight 10, Camera 0, direction: 30 degrees, pitch: 20 degrees |
|
Noise: Not applied |