
Photos that have been rendered in the Photo Lab can be inserted in the paper view. There are two ways to insert a photo; it can imported into the paper view or exported from the Photo Lab. Read more about both procedures below.

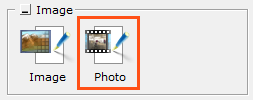
Figure 1: Photo icon in the paper view.
To place a photo in the paper view using the import feature in the paper view, follow these steps:
Go to the component tab Tools (paper) in the paper view.
Click the Photo icon in the field Image (see Figure 1). Move the mouse pointer to the sheet. A view port is attached to the mouse pointer.
Click once to set the starting point for the view port. Release the mouse button.
Stretch the view port vertically and horizontally to the desired size by moving the mouse.
Click once to set the ending point for the view port. Yellow snap points become visible on the view port and an input box is displayed.
Select the desired photo from either the drop-down menu Photo or click the Choose... button to select from a list with thumbnails. If the Photo Lab does not contain any photos, the input box displays a New button. Click this button to create a new photo. You can then doubleclick inside the view port to open the Photo Lab for editing and rendering. When you are satisfied, close the Photo Lab to return to the paper view. The view port has been updated to display the changes made in the Photo Lab.
You can now continue working in the paper view and change the sheet's appearance.

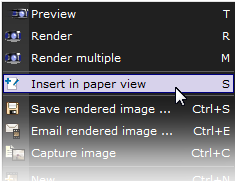
Figure 2: Insert in paper view option in the Photo Lab.
To place a photo in the paper view using the export feature in the Photo Lab, follow these steps:
Place the mouse pointer over the desired photo in the Photo Lab; either on one of the thumbnails at the bottom of the page, or on the photo displayed in the viewing area.
Right-click and select Insert in paper view from the menu (see Figure 2). Paper view opens as a separate window and displays the selected photo inside a view port.
You can now continue working in the paper view and change the sheet's appearance.