
Photo Lab is a built-in tool for creating photorealistic renderings in CET Designer. Photo Lab creates high-quality renderings with natural light and shading, renders multiple images at once, enables immediate post-rendering processing and post-rendering changes without the need to re-render and automatically updates changes made by the user in the rendering to ensure accuracy. It replaces the Photo Series and works seamlessly with CET Designer. Renderings take place in the background and do not interrupt your work. Photo Lab is able to use High Dynamic Range (HDR) imaging which allows a greater dynamic range of luminance between the lightest and darkest areas of an image than many standard digital imaging techniques or photographic methods. This range allows HDR images to more accurately represent the range of intensity levels found in real scenes. Photo Lab is fully synchronized with Paper View to make printing as easy and straight-forward as possible.

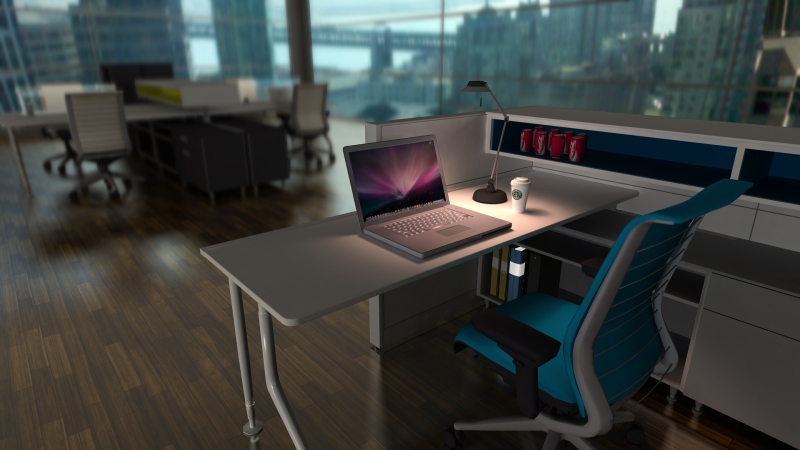
Figure 1: Photo or rendering? With Photo Lab renderings, it is hard to tell the difference.
To access Photo Lab, select the Photo Lab button on the 3D component tab or from the 3D view toolbar, as shown in figure 2 below.
![]()
Figure 2: The Photo Lab buttons in CET Designer.
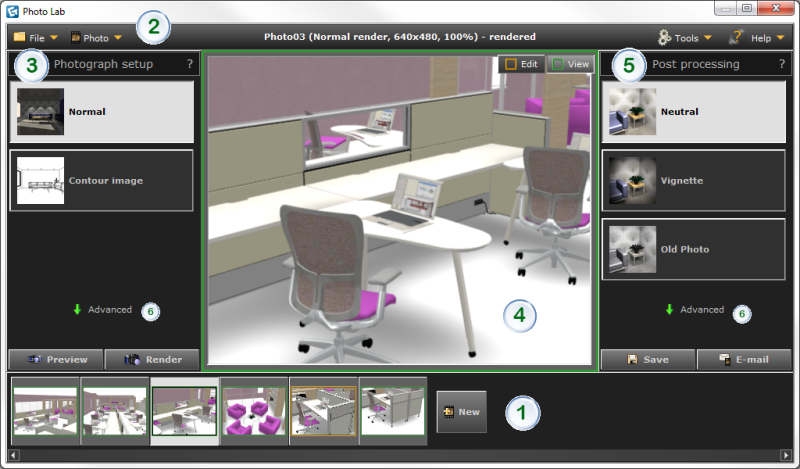
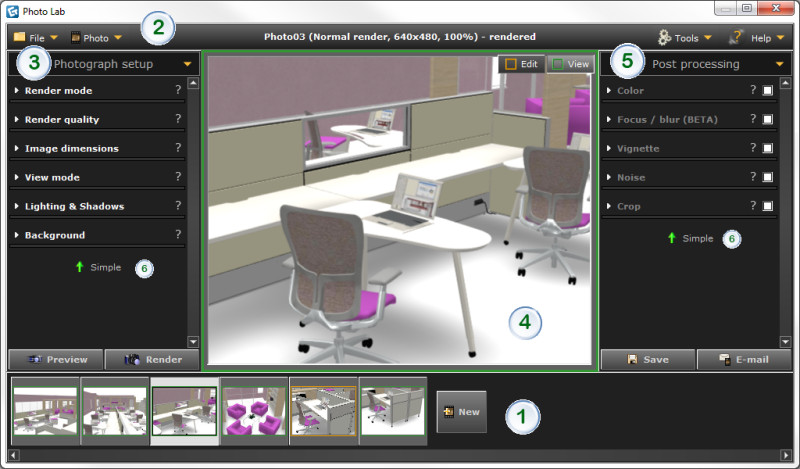
The Photo Lab window is divided into five main areas as shown in the pictures below: the thumbnails area, the menu bar, the photograph setup area, the viewing area, and the post processing area. At the top of the window there is a standard menu bar. Click the links below to read a detailed presentation of each area.
There are two modes for working in Photo Lab; Simple and Advanced.
Simple: use presets for the photograph setup and post processing.
Advanced: choose settings for the photograph setup and post processing.
The first time that the Photo Lab is opened it is displayed in simple mode. To switch to advanced mode, click the Advanced button. In the advanced mode, you can save presets for photograh setups and post processing and then share them with others.
Note Some features are only available when the advanced graphics engine is being used. This is specified for each feature in this chapter. |
 |
|
 |
Buttons for switching between simple and advanced mode (as described above) |

Figure 3: Overview of the Photo Lab interface in simple mode.

Figure 4: Overview of the Photo Lab interface in advanced mode.