A movie consists of one or several scenes. To record a scene you need to create a path that defines how the camera should move.
You can choose to record a scene in the 3D view fullscreen mode or in the 2D view by creating a camera path. You find a description of the two ways below.
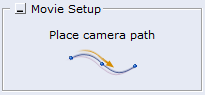
Figure 1 - the Place camera path icon
To record a scene in the 2D view you need to draw a camera path that defines how the camera should move.
Follow the steps below to create a camera path in the 2D view:
Click the Place camera path icon on the CET Movie Studio tab (see Figure 1 above).
Move the mouse pointer to the drawing area. A line is attached to the mouse pointer.
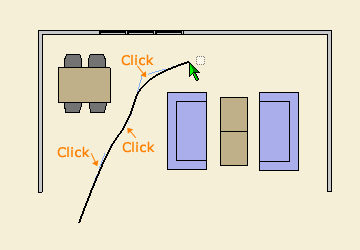
Click once where you wish to start your path.
Go to the next point where you wish to make a turn and click (see Figure 2).
Continue clicking until you have created a patch.
When you are satisfied with your path, move the mouse pointer outside the drawing area or press Esc.
Once you have completed the camera path, the Movie Editor appears.
|
|
Figure 2 - Click to make a turn |
Figure 3 - Select the path to edit it |
Note:
|
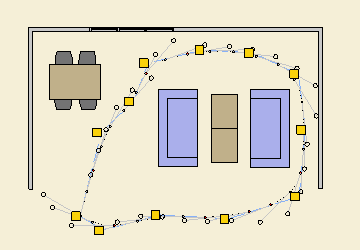
When you have created a path, you can edit the path in the drawing area. Select the path in the 2D drawing area. Yellow snap points are now visible.
You are now able to:
Change the path: By stretching the yellow snap points you can change the shape of the path.
Elevation: Set which height the camera should move at, default is 1 800 mm.
Pitch: Change how you would like the camera to be angled. Default pitch is 9 degree, this means that the camera is angled slightly downward.
Field of view: Change the visual field. Default is 30 degree.
Speed: Set the speed of the movie. If you increase the speed the number of red dots decreases and vise versa. The distance between two red dots is equal to a half a second in the movie.
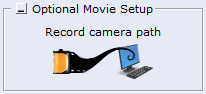
Figure 4 - Record camera path icon.
If you record your movie in fullscreen 3D view, you have more options than if you record your movie in the 2D view.
Follow the steps below to record a movie in fullscreen 3D view:
Click the Record camera path icon on the CET Movie Studio tab. You will now enter the fullscreen recording view.
Select desired recording mode in the drop down menu (read more about recording modes below).
Pan and zoom to desired starting point.
Click the Start recording button to start recording.
Move the mouse pointer around the room. Your mouse pointer is now a camera which records everything you see.
Click once when you wish to stop recording.
Click the Play preview button to view a preview of the movie. Note, when clicking the Play Preview button you will see all scenes that you have recorded. If you wish to view a specific scene you have to leave the fullscreen view and click the Movie editor button (see number 6 in Figure 5).
Start recording a new scene if desired.
Note: If you choose to record your movie in the 3D view, you will not be able to edit the camera path in the 2D view. |
![]()
Figure 5 - The fullscreen toolbar
There is a toolbar in the fullscreen 3D view. The options are described below:
Start recording: Click the Start recording button and use the mouse pointer as a camera and move around the drawing.
Play preview: All recorded scenes will be played one after the another.
The total length of the movie: The total length of the movie including all the scenes.
Set movie options: Click the button to decide recording mode etc. (read more about recording modes below).
Set the camera to default height and angle: Click the button to return to default settings for the camera (1 800 mm height and 9 degree angle).
Play, edit and export movies: Click the button to access the Movie Editor dialog
Leave fullscreen mode: Click the button to leave fullscreen mode and return to the drawing area.
You can choose between five different types of recording modes:
Walk mode: The camera (the mouse pointer) is moving at a fixed height and angle. To set desired height and angle, zoom and pan to desired position before clicking the Start recording button.
Pan mode: The camera (the mouse pointer) will be fixed at a defined position and then look in different directions depending on how you move the mouse pointer.
Walk left mode: The camera (the mouse pointer) will move to the left along a straight line. Note: if you move the mouse pointer, you can still move the camera in both directions, right or left.
Walk right mode: The camera (the mouse pointer) will move to the right along a straight line. Note: if you move the mouse pointer, you can still move the camera in both directions, right or left.
Fly mode: You can move the camera (the mouse pointer) in all directions. The camera is not fixed at a special height.