
You can change the settings for lines, arcs, circles, ellipses and rectangles, after you have positioned them in the drawing area.
In order to change a line drawing component in the drawing area, follow the instructions below:
Right-click on component. A pop-up menu is displayed.
Choose Settings from the pop-up menu. The Settings dialog is displayed.

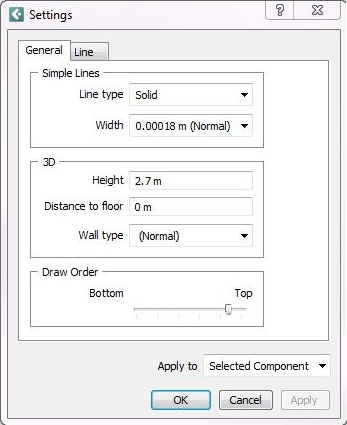
The Settings dialog layout is practically the same for all line drawing components. However, below we will describe the dialog appearing when right-clicking on a Line.
The Settings dialog for a Line has two main tabs: General and Line.
In the Simple Lines field, you can change the Line type and Width in the drop-down lists.
In the 3D field, in the Height box, you can change the height that the line has in 3D. Using Distance to floor you can set the distance between the floor and the bottom edge of the component. In the Wall type drop-down list, you can choose Normal or Net. See the section Net below.
In the Draw Order field, you can determine the order in which the selected component should be drawn in 2D (i.e. what layer it should be in). By dragging the slider to the maximum level, the component will end up on top of all other components. By dragging it to the lowest level, it will be shown beneath other components.
If you choose Net from the Wall type drop-down list on the General tab and click on Apply the line/wall will be changed to a net wall. In addition, the Net tab will be added to the Settings dialog.
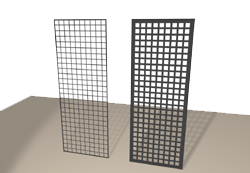
In the Net Wall field, you can change the Outer frame width (the thickness of the frame which surrounds the net) as well as the Wire thickness (the thickness of the individual wires). In Figure 1 below, the outer frame width of the left net is 20 mm and the wire thickness 10 mm. The outer frame width on the net to the right is 70 mm and the wire thickness is 30 mm.
In the Wire distance field, you can change the Horizontal and Vertical gap between the wires.

Figure 1
In the Apply to drop-down list, you can choose the components that the changes should affect.
When you have made the desired changes, always confirm with OK or Apply.
In the Settings field, you can change the component's Length and the Double line thickness (this applies only to the Double line).