
The Render Accelerator is built-in in Configura and its settings are accessible from the Render Settings dialog. (The Render Settings dialog itself is opened by clicking the Auto 3D (detailed) icon or right-click on a camera and select Develop.)
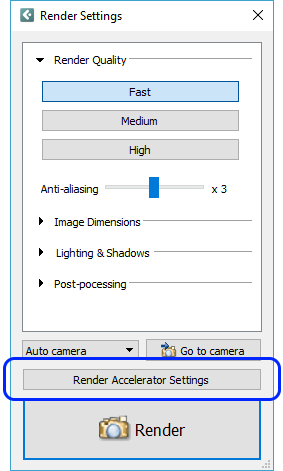
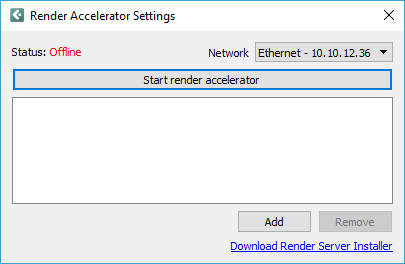
Clicking the Render Accelerator Settings will open both the Render Queue window and the Render Accelerator Settings dialog, simply because the latter is the property of the former. The Render Accelerator is offline as default. To start it, click the Start Render Accelerator button. Configura remembers the render accelerator's current state, meaning that if it is online and you close Configura, it will still be online when you re-open the program.
 |
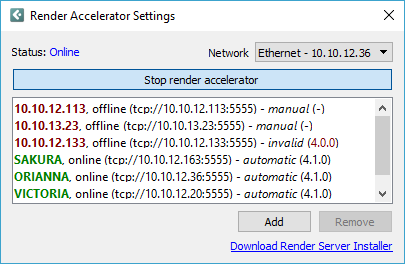 |
When online, the render accelerator lists resources that have been found automatically in the network. It is also possible to use the Add button to add resources manually. To add a resource to the network, you need to enter the computer name (as long as you are on the same subnet) or the IP address of the computer that you wish to add. The remove button can be used for removing resources that have been manually added, but is grayed out and cannot be used for automatically added resources.
The list contains information about each resource in the rendering network. The information presented computer ID, state (protocol/address/port) for communication with it, and whether it has been automatically or manually added. Green color indicates that the resource is answering and seems to be okay, while red color indicates that the resource is not answering of that it is answering strangely.
The link at the bottom of the dialog opens the Configura website in a web browser where you can download the installer for the freestanding render server. This will let you make your computer available as a resource in the rendering network.
In the Render Queue window, you are able to see whether or not the Render Accelerator is online, and how many resources and CPU-cores are ready to render. The Settings button opens the Render Accelerator Settings as shown above:
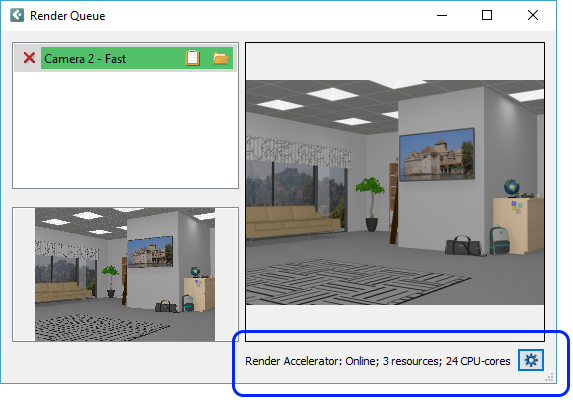
Once the render accelerator is online, go ahead and render your images as usual, and the different render jobs will be distributed across the resources available.