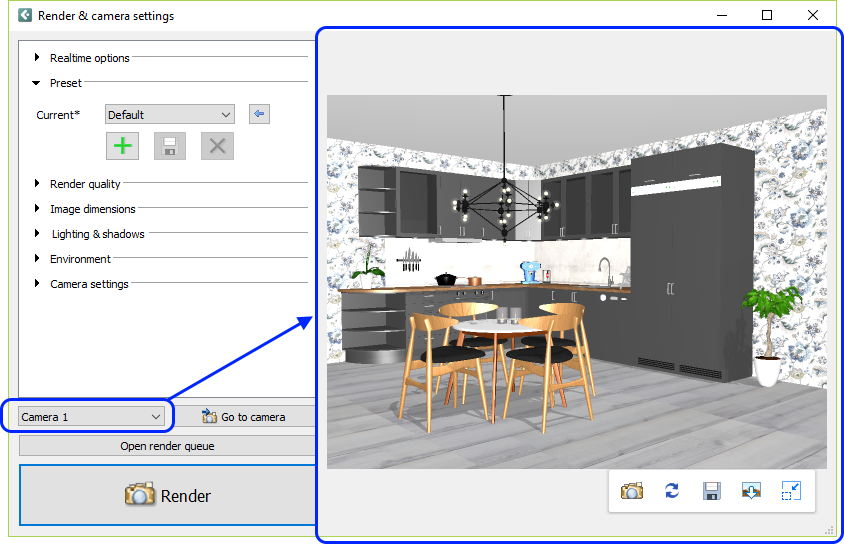

The main part of the Render & camera settings dialog consists of a Realtime view where you can see what the currently selected camera is capturing:

The Realtime view is interactive, and below you'll find descriptions of its features.
When you open the Render & camera settings dialog, a progress bar at the bottom of the Realtime view will quickly flash by, showing whether the scene is still loading or has finished loading. This process is normally quite fast, so you might not notice the progress bar at all.
Blue = the scene is still being loaded and not all objects are in place yet:

Green = the scene has finished loading and all objects are in place:

If you have the Render & camera settings dialog open and add, remove, or move objects in the drawing, the Realtime view instantly updates to reflect the changes made.
Note:
|
Changing the settings to the left in the Render & camera settings dialog will update the Realtime view to reflect the changes. Follow these links to read more about the options available: Realtime options, Preset, Render quality, Image dimensions, Lighting & shadows, Environment, and Camera settings.
Moving the cursor into the Realtime view will bring up a toolbar in the lower right corner:

Starting from the left, these tools are:
Render scene: renders the scene in the Realtime view, with the selected render settings. |
|
Refresh scene (F5): forces a full refresh of the scene. If Auto update view is disabled in the Realtime view options, use this tool to update the scene. It could also be necessary to do a refresh if changes in the drawing are not visible in the Realtime view. |
|
Show shadows: triggers an update of the shadows in the Realtime view. Only available when Auto update shadows is disabled in the Realtime options. |
|
Save view (Ctrl + S): lets you save the Realtime view as an image file in the location of your choice. |
|
Insert view (Ctrl + I): saves the Realtime view as an image and then inserts it into the drawing area. |
|
Compact mode (F11): puts the dialog in a compact mode by hiding the settings menu on the left. |
Although there is no Copy button in the toolbar, you can still use the Windows keyboard shortcut Ctrl + C to copy the Realtime view to the clipboard (and then paste it with Ctrl + V).