
Photo rendering from the Walkthrough is effortless. You can stop anywhere, klick the render button and then continue to work while the image is being rendered. Several render tasks can be queued up and render in the background.

The renderings are queued up in a separate window, the Render queue, where you can add post-processing, save the image, copy it to the clipboard and much more.
When rendering from the Walkthrough, the Camera position toolbox could be useful for finding good angles. The toolbox is hidden by default and is toggled to show/hide with the Tab key or the button in the toolbar:
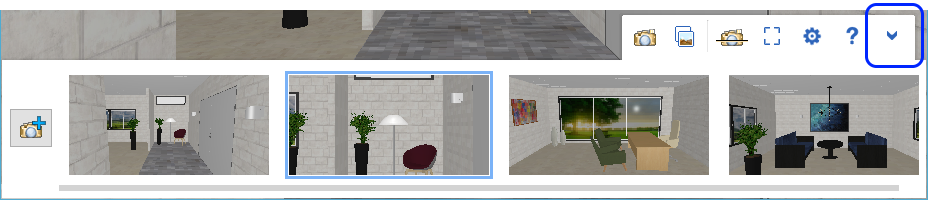
There are now a couple of scenarios for what the toolbox will show:
If no camera in the drawing was selected when you started the Walkthrough, the toolbox shows the position of the auto camera.
If a camera in the drawing was selected when you started the Walkthrough, the toolbox shows the positions of all cameras in the drawing.
Note:
|
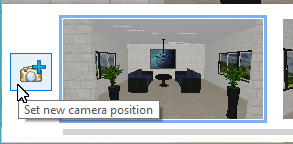
The camera positions serve as starting points that you can tweak and modify to suit your needs. You can save a new camera position whenever you want by clicking the Set new camera position button to the left in the toolbox:
Once you are happy with a camera position, you can either render straight away, or open the Render settings and adjust them before rendering.
Note:
|