
Using the Import 3D Objects feature, three-dimensional objects in the selected formats can be imported to the drawing area and be displayed in 3D. Configura has the ability to import several 3D formats: .3ds, .stl, .3dc, .3d, .skp, .step, .stp.
This component can also be used for importing AutoCAD 3D models (files with the extensions .dwg, .dxf, or .sat) as 3D objects in Configura; enabling you to apply 3D materials to them.
To import a 3D object, follow these steps:
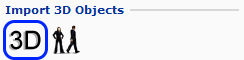
On the Import
and Export tab, select the Import
3D Objects component and click it in place in the drawing area.
The dialog 3D Import Settings
is displayed.
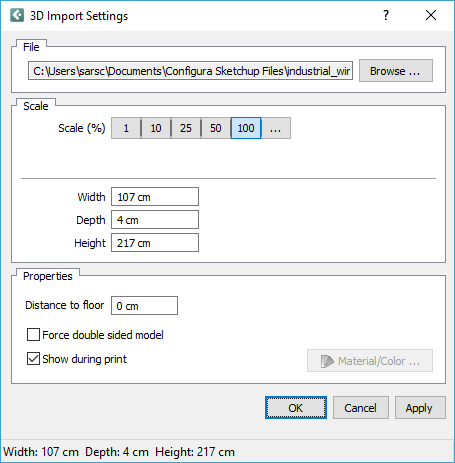
In the File field, click on the Browse button to select the file that you would like to import.
Make your settings in the Scale field:
Scale (%) - The scale
of an imported 3D object is specified by clicking one of the options.
With the button 100 (%) you choose the scale that corresponds to the
original size of the object. If the button 50 (%) is used, the object
will be displayed in half its original size and so on.
Clicking the "..." button on the right-hand side enables
you to enter your own scale. This is done in the text field to the
right of the button. To get the right scale (the size of the imported
object in relation to other components on the drawing) you often have
to experiment a little.
If you choose to enter your own scale by using the "..."
button and entering for instance 30, you have to click Apply to update the size displayed
at the bottom left of the dialog.
Model Space Unit - By selecting Model space unit, you determine which measurement unit to use.
Size - The size of the object is automatically displayed at in the input fields named Width, Depth and Height. If you wish, you can change the size of the object. Just change the values in the input fields.
In the Properties field, you can set a Distance to floor and enable the Force double sided model option. You can also prevent the 3D object from showing on prints by deselecting the checkbox Show during print.
Click OK or Apply.
Now that the object is imported into the drawing area, use the Material/Color change dialog to apply 3D materials.
Note:
|
If you are importing a 3ds file, you can select a different color or material for the object.
Proceed as follows:
Select the desired file and click Apply.
In the 3D Import Settings dialog, click the Material/Color button. The dialog Material/Color Change is displayed.
In the drop-down list Surface Name, choose the part of the object that you want to change.
Select RGB Color, Predefined or Texture.
Click OK or Apply.
Back in the dialog 3D Import Settings, confirm by clicking OK or Apply.
Note:
|
To import a human model, follow these steps:
On the Import
and Export tab, select the People
component and click it in place in the drawing area. The Models
overview opens:
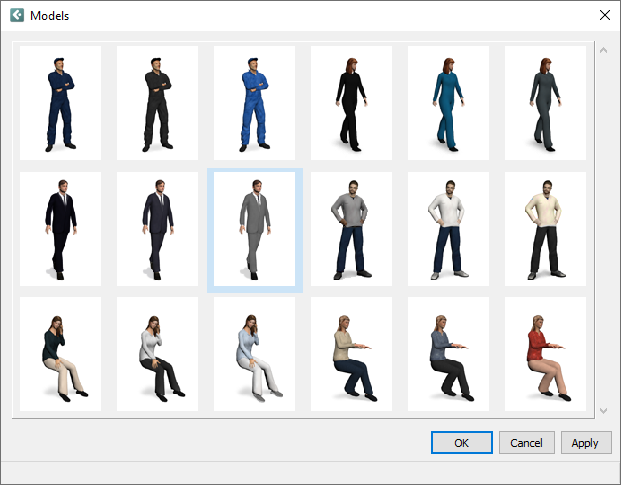
Select the desired model and click OK. The placeholder in the drawing area is updated to show the model you selected.