
When InstantPlanner runs in advanced graphics mode, it is possible to allocate image rendering to a separate render server, which has several advantages:
The rendering takes place in a separate process, in its own window, you can continue working in InstantPlanner while your rendering is being processed.
The rendering will continue even if you close the InstantPlanner main window.
Since the advanced graphics engine is utilized, the image displays a higher sense of realism with improved light and shadow nuances and more advanced graphics settings.
Here is an overview to show the default setting for the different ways of rendering available in InstantPlanner:
Way of rendering |
Default setting |
Auto 3D (Preview) and Auto3D (Detailed) buttons in the toolbar |
Render server (advanced graphics engine) |
Render buttons in Configura Walkthrough |
Render server (advanced graphics engine) |
Right-click on camera and select Develop |
Render server (advanced graphics engine) |
Right-click on camera and select Develop (Old engine) |
Old process (simple graphics engine) |
Develop button in the Camera Settings dialog |
Old process (simple graphics engine) |
Develop icon in the Camera View |
Old process (simple graphics engine) |
When InstantPlanner runs in simple graphics mode, the render server cannot be utilized. This means that the rendering process locks the program and you will not be able to continue working in your drawing during the rendering. Also, lights and shadows are quite basic and less vivid.
To check whether InstantPlanner runs in simple or advanced graphics mode, go to the User Interface tab in the Control Panel.
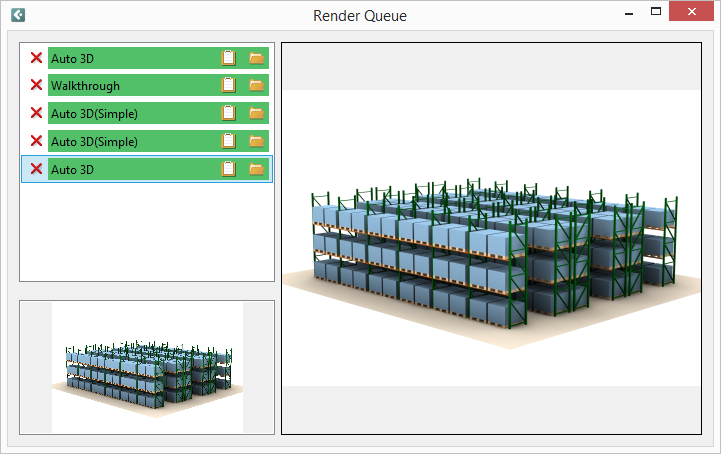
Whenever a render task is sent to the render server, the Render Queue window opens. At the bottom left, is a preview of the current render job. The right part of the window is a viewing area where the image that you have selected in the list to the left is shown:

Each item in the list has two icons to the right. The leftmost icon is Copy to clipboard, and the rightmost icon is Open containing folder. Each item can also be easily removed with the red removal X.
|