
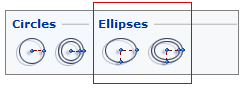
Under the heading Ellipses, you will find two items - the Ellipse through radii and a double version of the ellipse. Below, we will describe the behavior of the single ellipse.
Provided that you have pre-set a height for the ellipses in the Defaults dialog, they will appear in 3D.
You place ellipses in the same way as other line drawing components. You can also stretch the ellipse to change the radii and rotate it. It is also possible to change its color in the plan view as well as in 3D.
There are two ways of using the ellipse - follow one of the sets of instructions below:
A. Using the input display
Select the Ellipse through radii component and click it in position on the drawing area. An input display is shown.
Enter Radius A.
Press the Tab key to get to the next field. Enter Radius B.
Press the Tab key to get to the next field. Enter the desired Angle.
Confirm your entries by pressing Enter.
B. Using the mouse
Select the component and click it in position in the drawing area. Release the mouse button.
Move the mouse pointer from the center and select the desired direction. When the ellipse has the desired Radius A, click.
Move the mouse pointer in the desired direction. When the ellipse has the desired Radius B, click a final time.
|
Note:
|