
CET Designer allows you to import CAD-files with the file formats dwg or dxf.
![]()
Figure 1 - The CAD (dwg/dxf) dialog icon on the Tools component tab.
Follow the steps below to import a dwg/dxf drawing:
Select Import CAD (dwg/dxf) drawing from the File menu, alternatively click the CAD (dwg/dxf) dialog icon on the Tools component tab (see Figure 1).
Click the Import new button (see Figure 2, no. 2). An Open dialog appears.
Locate the file you are looking for. Select the file name and click Open.
Go to the CAD (dwg/dxf) properties tab and to the CAD (dwg/dxf) layers tab and make desired settings.
If you wish to preview the drawing with the applied settings, click the Apply button. A tip is to deselect the Show in 3D view check box.
Click OK.

Figure 2 - The top part of the CAD (dwg/dsf) dialog.
Note:
|
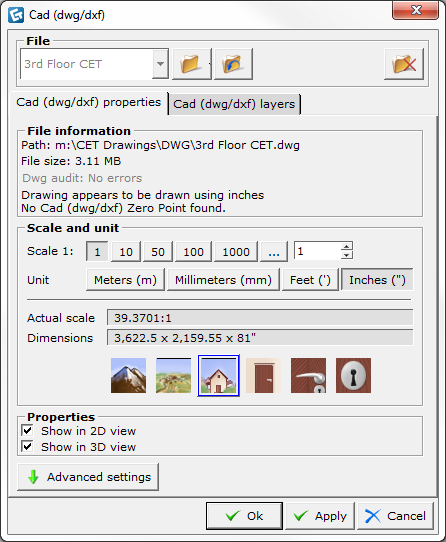
The CAD (dwg/dxf) dialog consists of two tabs: CAD (dwg/dxf) properties and CAD (dwg/dxf) layers, as you can see in Figure 1 above.
The CAD (dwg/dxf) properties tab is divided into four fields:
File: Here you load your CAD drawing (see description above).
File information: Here you see detailed information about the loaded file. If you have loaded more than one file, the information is about the file that is selected in the filed at the top of the dialog box (see Figure 2, no. 1).
Scale and unit: Select the original drawing scale by using one of the buttons or by entering a value in the text box to the right. Finally, choose the geometrical unit that was used for the original drawing. The actual scale and dimensions are calculated and shown below.
Properties: Determine where you would like the imported dwg/dxf drawing to be displayed in CET Designer, in the 2D and/or in the 3D view.
You also have the option to make further settings by clicking the Advanced settings button.

Figure 3