
The Family Exporter tool is used to create Family files (Revit objects) for Revit Architecture. A Family file contains of one or more types.
To create families, follow the steps below:
Click the Create family files button on the RevLink tab (see Figure 1). When you click the button you will be asked to Tag your articles (if you haven't done this before).
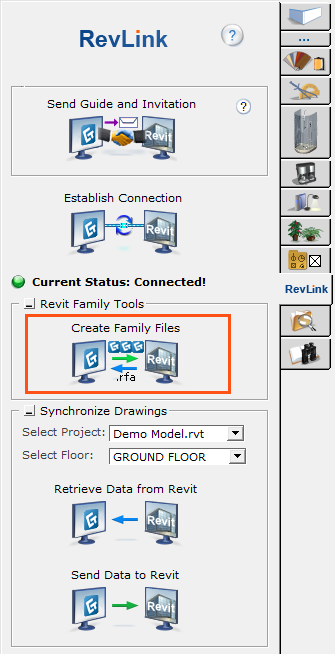
Figure 1
Tag the articles you would like to export to families. Use Category for the Family file and Tag for the Family type. See Figure 2 below. Close the Part Tagging dialog.
Note: You can only do individual tagging. |
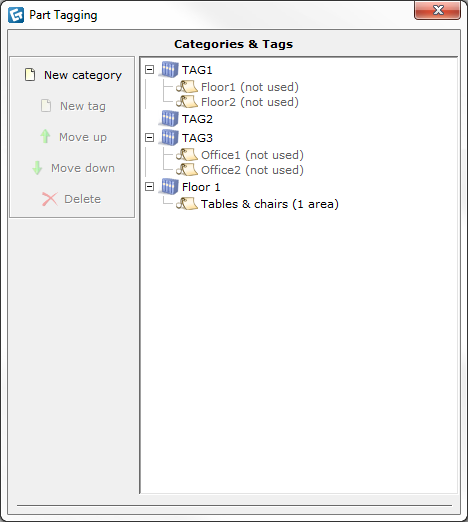
Figure 2
Click the Establish Connection button on the RevLink tab. Make sure that you are connected to Revit by looking at the status indicator in top of the Revit Settings dialog.
Click the Create family files button on the RevLink tab. The Family Exporter dialog will appear. See Figure 3 below.
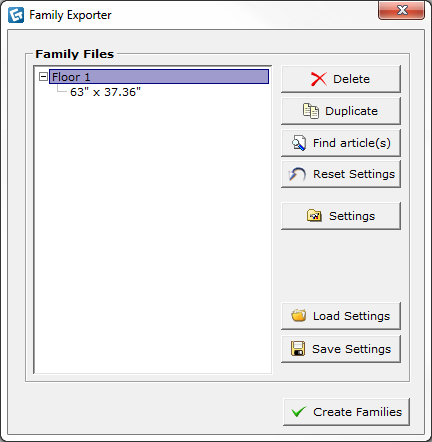
Figure 3
Click Create Families. If you have a connection to Revit you will be asked to pick a directory where you want to put your families.
CET Designer will now connect to Revit and Revit will create the families for you. Once this is done CET Designer downloads the families. (see Figure 4)
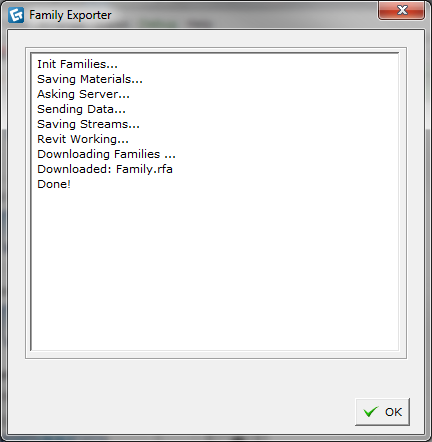
Figure 4
You will find your families in the selected directory!