
On the Lighting tab (see Figure 1) you can change the lighting effects in an image.
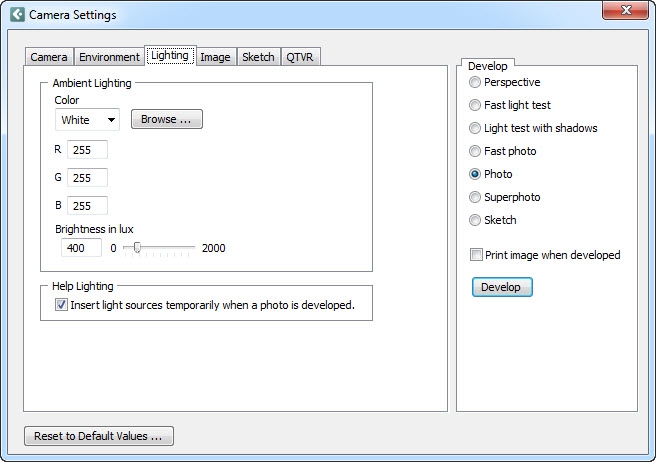
Figure 1 - The Lighting tab
In the Ambient Lighting field, under Color, you can choose colored light, either by choosing a color from the list, or by entering values for an RGB color. You can also click on the Browse button if you want to open the dialog Select and Edit RGB Color. In this dialog you can easily create your own RGB colors and store them in a database.
For example, if you want yellow light instead of white, follow these instructions:
Click on the arrow in the drop-down list under the heading Color.
Choose Yellow.
Click on the Develop button on the right-hand side of the dialog.
Normal daylight is reproduced in the program and is referred to as 'ambient lighting'. Adjustments regarding the brightness of this lighting can be done in the Ambient Lighting field. The default brightness setting is 600 lux. Using the slider under the heading Brightness in lux you can choose the brightness of the ambient lighting (0-2000 lux). To get the best lighting effect however, it is simpler to use several light sources, for example - lighting fittings, spotlights or a sun.
Below the heading Help Lighting, you can check the box: Insert light sources temporarily when a photo is developed. Then you will automatically be given help with the lighting of your manually rendered images. If there are no light sources in the drawing area when you click the Develop button in the right-hand part of the camera dialog, the program will insert two spotlights and a sun temporarily for you. However, these components will be removed again once the image is created. It is therefore not possible to change their settings.
If a light source has already been placed manually in the drawing area, the help lighting will not be activated.
|
Note:
|