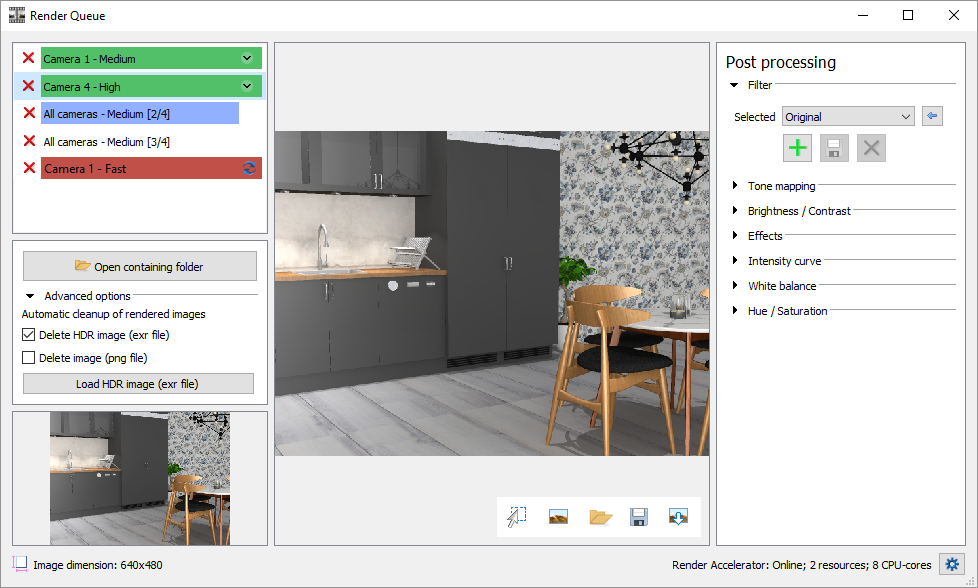
Whenever a render task is sent to the render server, the Render Queue window opens. At the bottom left, is a preview of the current render job. The center part of the window is a viewing area where the image that you have selected in the list to the left is shown. To the right are controls for post-processing.
If you have closed the Render Queue window, you can always open it again from the Render & camera Settings dialog.
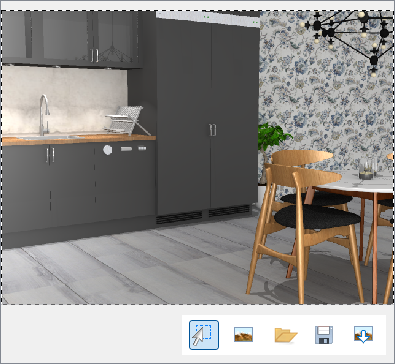
After a render job has finished in the Render Queue, moving the cursor into the viewing area will pop up a toolbar:
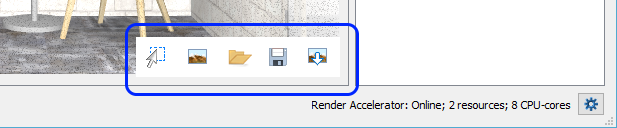
The toolbar gives you easy access to these tools for handling the rendering in different ways:
|
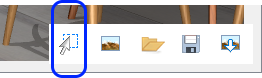
Selection mode on/off: enables / disables the selection mode. |
|
|
|
Show image (Ctrl + O): shows the image in your default Windows image viewer. |
|
|
|
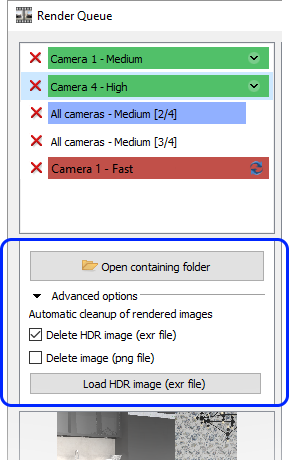
Open containing folder (Ctrl + F): opens the containing folder and highlights the selected image. |
|
|
|
Save image (Ctrl + S): lets you save the image in the location of your choice. |
|
|
|
Insert image (Ctrl + I): saves the image and then inserts it into the drawing area. |
Although there is no Copy button in the toolbar, you can still use the Windows keyboard shortcut Ctrl + C to copy the Realtime view to the clipboard (and then paste it with Ctrl + V).
You can also access these tools, and an extra one for copying the image to the clipboard, from the drop-down menu for each finished render job:
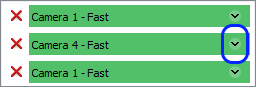
The render jobs in the list to the left have different colors depending on their status:
Blue row indicates a rendering in progress.
Green row indicates that the rendering was successful and that the image is finished.
Red row indicates that something went wrong during rendering.
You can hover with the mouse over a rendering in progress in the list (blue row) to see which computer is accelerating the rendering.
In the toolbar that pops up in the viewing area there is an Area selection tool, with a functionality similar different snipping tools. Using the Area selection tool, you can easily highlight certain areas in your renderings, which can then be saved, copied to the clipboard, or inserted in the drawing area.
To use the Area selection tool, follow these steps:
Click the Selection mode on/off
button in the toolbar to activate the tool:
The rendering in the viewing area is now framed with an animated
border to indicate that it is in selection mode. By default, the entire
rendering is framed:
To select an area, move the cursor to the image, then click
and hold to draw a box. The border is still animated and the area
outside of the selection turns slightly milk:

If you are not happy with the contents of the box, i.e. your selection,
keep drawing new ones until you are satisfied. Clicking the Cancel selection button  will cancel the selection
and turn the tool off, allowing you to start over again.
will cancel the selection
and turn the tool off, allowing you to start over again.
When you are happy with the selection, confirm it by performing one of the following actions. Either option will make the animated border freeze:
Click the Selection mode on/off button.
Click anywhere in the viewing area.
Press the Esc key.
The selected area can now be handled in different ways:
Use drag and drop to insert the selection as an image into the drawing area.
Use the options in the drop-down menu of the render job you are currently working with.
|
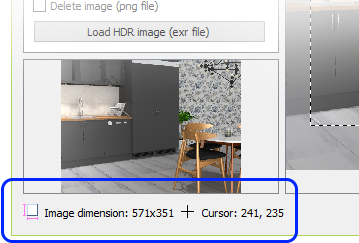
All renderings are saved in two image formats in the Render Queue folder - .png (normal image) and .exr (HDR image). The reason for saving .exr images as an addition to the normal images is to enable post processing in Configura or other photo editing software. If you have added any post processing effects, however, this is reflected in the .png file. To apply post processing to a rendering that is no longer available in the list in the Render Queue, use the Load HDR image button found to the left in the Render Queue dialog.
Also found in the Advanced options are tools for enabling automatic cleanup of rendered images from the render queue and the render queue folder.
You can choose to delete either the .exr file, the .png file,
or both. The cleanup will take place when you delete a render job,
or when you close the Render Queue window.
Note that the Delete HDR image (exr
file) is selected by default.
If you have loaded an HDR image manually with this button, it
will not be removed from the render queue folder during cleanup; only
from the actual render queue window.
Note that images that have been removed from the render queue folder
cannot be restored.
|