
For layout purposes, before starting drawing using the cantilever bays, it is recommended to use Templates. Templates are drawing help for placing the cantilever bays.
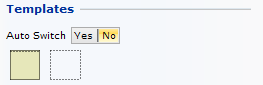
Activating the Auto Switch choice by selecting Yes will make the program automatically switch between templates and aisles when you set out the layout of the system. This mean that you will be given an aisle after a template, a template after the aisle and so on.
|
Note:
|
To lay out the space using templates, follow the steps below:
At the top of the tab, complete the Design Specifications for the cantilever system.
In the Templates field, ensure that Auto Switch is activated.
Select a Template component by clicking on it. Move the pointer and the attached component (Note that, at this point, you do not need to hold down the mouse button) to the required location in the drawing area.
Click the template in position on the drawing area, continue to click and hold the left mouse button. Adjust the length of the template by dragging it lengthwise to the right (the length and width are displayed in a yellow measurement box when you start dragging). Release the mouse button when it has the desired length.
In the drawing area, the component with your mouse pointer has now switched to an Aisle component, this is since Auto Switch was set to Yes. Move the Aisle component towards the center of the Template component. The aisle will snap to the template. Click to position it.
The component with your mouse pointer has now switched to a Template component. Snap it to the Aisle component and click.
Continue adding templates and aisles until your template layout is ready.
Now you can let the program fill the templates with cantilever bays automatically, using the Auto/Copy command. This drawing method is quick and efficient and should mainly be used for large standard systems with identical cantilever bays.
|
Note:
|
Figure 2: example of the back side with snap points.