
CET Designer generates a complete bill of materials while the drawing is being prepared. Changes in the drawing will automatically update the pricing and the part numbers in the calculation. Because of this you can be assured that the pricing shown in the quote always is correct.
If you are working with several alternative drawings for the customer, you get detailed quotes for each and every alternative. The quote can be saved in PDF format, and sent as an e-mail attachment and/or printed out on paper.
To print reports and drawings in CET Designer, follow these steps:
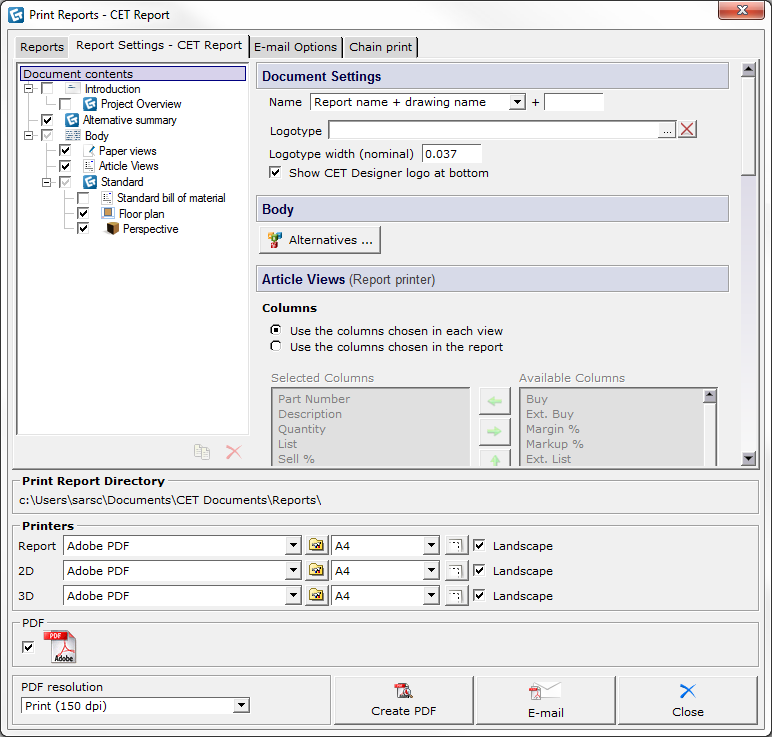
Select Print Reports from the File menu. The Print Reports dialog box opens (see Figure 1 below).
Go to the Report Settings tab. Under Document contents, mark the check boxes and select the desired option (by clicking the heading) for the reports, drawings and perspectives that you would like to print.
Choose the contents by putting a check mark in the check boxes; Introduction, Project Overview, Body, Standard bill of material, Floor plan, Perspective etc.
Choose your printer settings at the bottom of the dialog.
To view the proposal before printing, click the Preview button.
Finally click the button Print.
To generate a PDF file, check the box in the left-bottom corner and click the button Create PDF.

Figure 1
Note:
|