
In the Render & camera settings, you can change the Environment in which the components are located. For example, you can add background effects and remove or add a floor or a ceiling.
To add a ceiling or floor to your 3D image, check the boxes for Automatic ceiling and/or Automatic floor.
Having selected the Automatic ceiling checkbox, your space will now have a ceiling when you look at it in the Render & camera settings dialog or the Walkthrough.
Please note that the ceiling is see-through from above looking down in order to not block the view. If you look up through it from a lower point, you will see that the ceiling is there. The see-through ceiling also lets sunlight through. This means that strong sunlight will have a large impact on the lights and shadows inside the room. You may therefore need to pull down the sunlight quite a bit, or make the ceiling Double sided to achieve the result that you want.
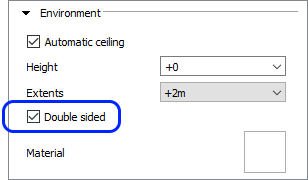
Having enabled the automatic ceiling, you can specify:
its height above the highest point in the scene. By default, the automatic ceiling is placed at the highest point in the scene, which is not necessarily the walls.
its width outside of the outmost object in the scene. By default the automatic ceiling ends in line with the outmost object in the scene, which is not necessarily the walls.
Clicking the material preview opens the Material/Color change dialog where you can apply a different color or texture to the ceiling.
Having selected the Automatic floor checkbox, your space will now have a floor when you look at it in the Render & camera settings dialog or the Walkthrough.
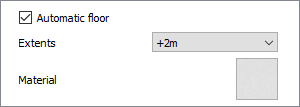
Having enabled the automatic floor, you can specify how much it should extend outside of the walls.
Clicking the material preview opens the Material/Color change dialog where you can apply a different color or texture to the floor.
In the Background drop-down list you will find some different backgrounds that you can use when you develop 3D images. The backgrounds are White, Sky Blue, Light grey and Grey.
Note:
|
Regardless of which environment settings you decide to use, you can go into the other settings and tweak them according to your wishes before rendering the image. Follow these links to read more about the options available: Realtime options, Preset, Render quality, Image dimensions, Lighting & shadows, and Camera settings.