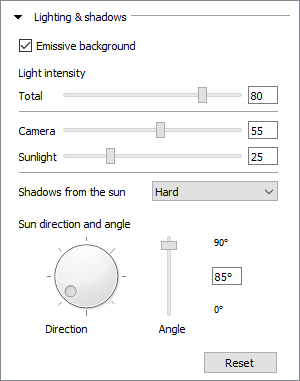

In the Render & camera settings, there are multiple options that apply to Lighting & shadows. Changing the settings for Lighting & shadows can have a great effect on your renderings, making them look quite different from one another. For example, it is possible to mimic the way the light shines through windows at different times of the day, or create a feeling of dusk or night.

Selecting either the Medium or the High render quality at the top of this dialog will show an Emissive background checkbox in this section. Leaving this box checked, which is the default setting and recommended in most cases, will add a lot of additional light onto the scene during rendering. This is mostly a good thing that contributes to realistic-looking renderings, but open scenes* with very bright colors, textures, and models could render too bright. If this is the case, try deselecting the emissive background. Note that if you are working on a closed room with walls and ceiling, the emissive background will have very little or no effect at all. In this situation, you will need to work with other light sources, such as the camera light or the ceiling with integrated lights, to achieve good lighting.
*For open scenes, try rendering with the Fast render quality instead, which is based on a lighting technique (ambient light) more suitable for open scenes.
Total: will increase or
decrease the intensity of all light sources in the Render & camera
settings dialog (i.e. Ambient, Camera, and Sunlight).
Ambient: this light is only available when using the Realtime or Fast render quality where it serves as a background light that illuminates everything in the scene, making it easy to adjust the overall lighting.
Sunlight: controls the simulated sunlight that can be adjusted by altering the direction and angle of the sun further down.
Camera: controls the light that originates from the position of the camera. When using the Medium or High render quality, increasing the camera light is a quick way of gaining more light in the scene, but bear in mind that it is a non-realistic, sharp light that does not cast any shadows.
Select if you want the sun to cast hard shadows or no shadows at all. Note that selecting None will allow the sun to shine through walls.
Spinning the Direction wheel will, for example, make the sun shine in through a specific window. Adjusting the Angle lets you simulate the daylight at different times of the day (90 = shining straight down, 40 = mid afternoon etc.).
Note:
|
Regardless of which lighting and shadows settings you decide to use, you can go into the other settings and tweak them according to your wishes before rendering the image. Follow these links to read more about the options available: Realtime options, Preset, Render quality, Image dimensions, Environment, and Camera settings.