
The settings for rendering from the Walkthrough, and for the Walkthrough itself, can be accessed from the toolbar at the bottom of the Walkthrough window

or by pressing F12 or the Q key on your keyboard.
You will notice the settings opening on the left side of the Walkthrough window and being separated into two tabs:
Render settings (Presets, Render quality, Image dimension, Lighting & shadows)
Walkthrough settings (Language, Realtime graphics, Movement speed, Camera, Mouse, Keyboard)
Follow the links to learn more.
Note:
|
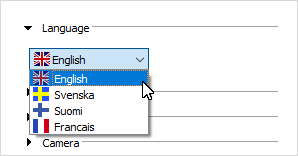
Here, you can select which language the Walkthrough window should be displayed in:
The settings will affect how the scene looks in the Walkthrough window:
Keep aspect ratio: deselected by default which means that Configura disregards of the relationship between the width and the height of the scene and allow the scene to fill the entire Walkthrough window. Selecting the checkbox means that the relationship between the width and the height of the scene, as stated in the selected Image Dimension, remains when resizing the window.
Shadows: enabling shadows makes the 3D objects in your drawing cast simplified shadows in the walkthrough.
Anti-aliasing: using anti-aliasing is a way of making lines and edges look soft and smooth, which adds extra quality to a walkthrough. Bear in mind, however, that the more anti-alias you use, the harder your computer has to work. Setting a high anti-alias may result in a rather jerky walkthrough.
Transparency quality: move this slider further to the right to increase the quality of transparent materials in the drawing. Bear in mind, however, that the higher transparency quality you set, the harder your computer has to work. Setting a high transparency quality may result in a rather jerky walkthrough.
Here, you can set the camera movement speed for Walking, Turning and Climbing. Default speed is x1. Holding down the Shift key while moving temporarily increases the movement speed to roughly three times normal.
If you want, you can change the camera default height. System default is 1.50 meters.
This is where you control how what moving the mouse means in the walkthrough.
Move with left mouse button: while pressing the left mouse button, moving the pointer up or down moves you forward or backward. Moving the pointer left or right turns you in that direction. The further the pointer is moved from the center, the faster you move or turn. When deactivated (default), left and right mouse buttons do the same thing, i.e. activates mouse look.
Invert Y-axis: moves the scene down when moving the cursor up and vice versa.
Invert X-axis: moves the scene to the right when moving the cursor to the left and vice versa.
As for the mouse, the Invert X-axis option makes the scene move to the right when you move to the left and vice versa.
Resets all values to system default.
Related pages
Rendering photos from the Walkthrough