
The Light source is used as a general light. It produces quite a strong light and, usually, it is enough to put out one light source on a drawing layout. Just like the other components under the 3D heading, the light source is invisible in 3D (in a developed image).
|
Note:
|
The light source has the same dialog for settings as all the Lighting fittings on the Accessories tab.
By double-clicking on the light source, or by right-clicking and choosing Settings from the pop-up menu, you open the dialog Light Source Settings. In this dialog you can turn the light source on and off, adjust its height, change the brightness of the light and much more.
In the Status field, you can turn the light source on or off using the radio buttons On and Off.
In the Height field, you can adjust the Ceiling height and the Light height. Enter the desired values in the text boxes.
In the Color field, you can choose the color of the light from the drop-down list. If you choose Custom from the list, you can either enter values for an RGB color in the R, G and B boxes below, or click on Browse. This opens the Select and Edit RGB Color dialog. See the topic Creating your own RGB Colors.
In the Lighting field, you can change the brightness and the quality of the light. In the Brightness drop-down list, you can choose between 5-4000 watt. In the next drop-down list, Shadow quality, you can choose how sharp the shadows on your 3D images should be.
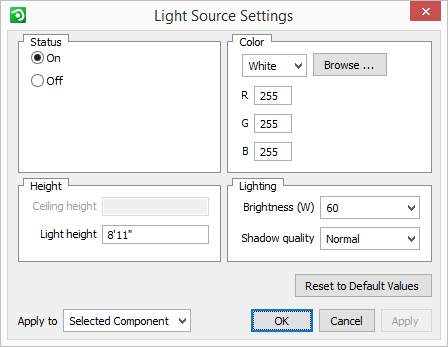
At the bottom of the Light Source Settings dialog is a Reset to Default Values button where at any stage, you can reset the dialog to the default values.
In the Apply to drop-down list, you can choose how many components should be changed.
When you are happy with your settings, click on OK or Apply.